Rocket Raccoon and Star-Lord
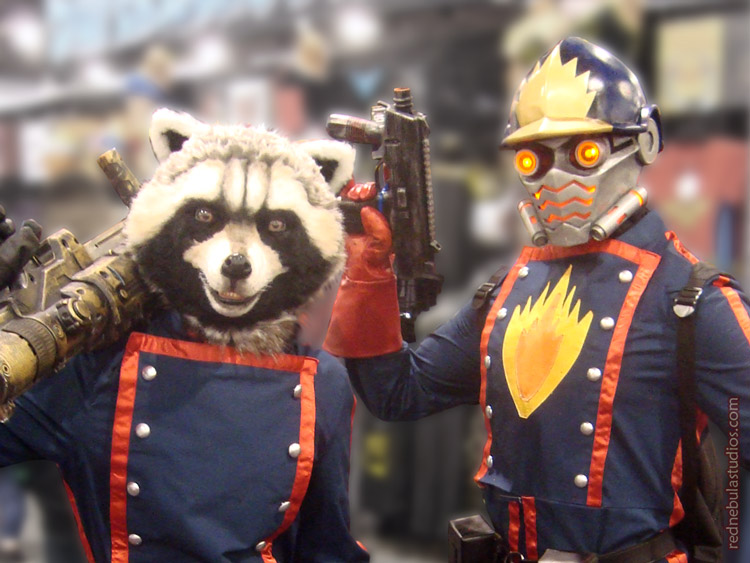
This handsome pair needs no introduction - or do they? I'm sure you recognize Rocket Raccoon, but since the Guardians of the Galaxy movie came out, most of the cosplays of Star-Lord you see are the new version. This version, with the full head helmet, is the comic book version, specially requested for this commission.
I crafted the mask, feet, and tail for Rocket and the helm for Star-Lord. The remaining clothing for the costumes were created by Geekster's Whimsy Cosplay.
Rocket Raccoon Build
Rocket's mask, legs, and tail feature high quality faux furs from Mendels. The mask has hand-painted details on the face, realistic glass eyes, and a moving jaw with teeth and tongue. The toes and pawpads on the feet are cast in silicone, with resin claws.


Here's the sculpture for the base of this mask. It was done in my usual favorite oil-based clay, Monster Clay, and sealed with clear acrylic spray all ready to be molded.
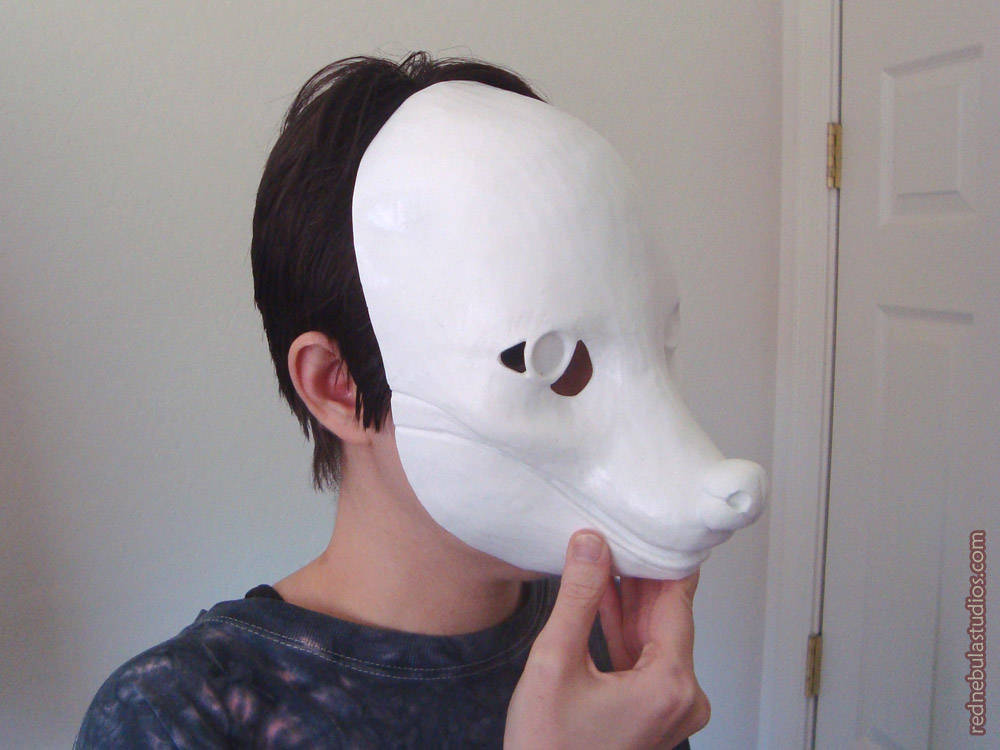
After I made a silicone mold of the sculpture, I cast it using SmoothCast 65D polyurethane resin.
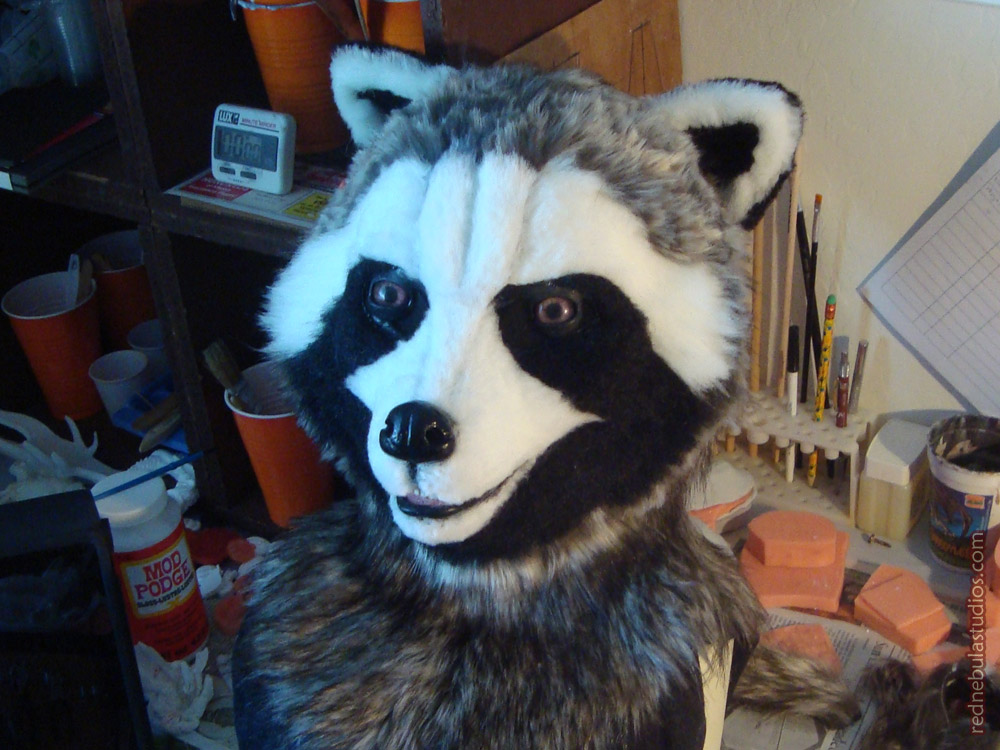
Bit of a jump - I was working fast and forgot to stop to take pictures! Here's the mask with all of the fur on and trimmed, but not yet detailed. He kind of looks like a panda at this point. (*snrk* Trash panda.)


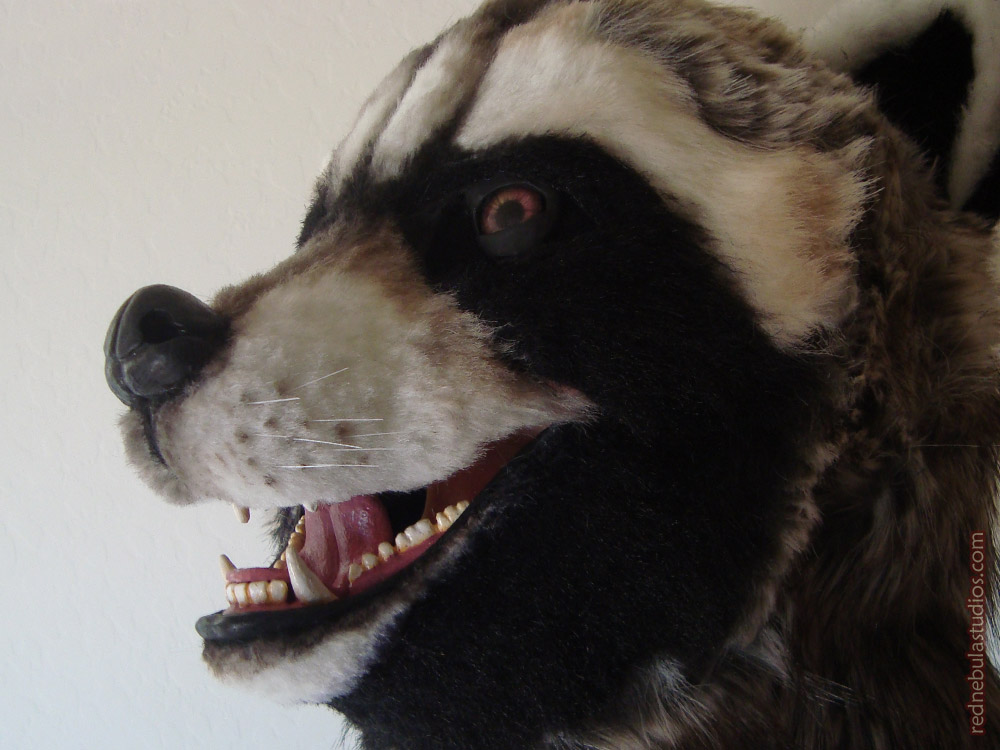
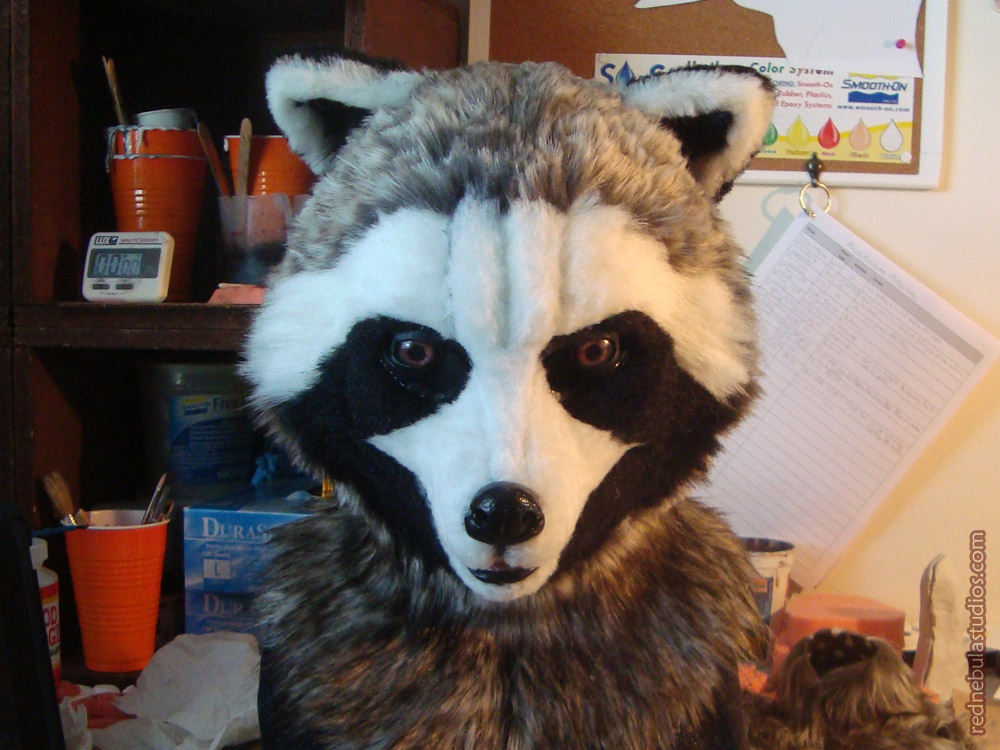
Here's a few more pictures of the finished mask. The third one shows how he looks with the mouth open. The fur was hand-painted with watered down acrylics and brushed to keep it as soft as possible. Each whisker was hand-glued in place.
Front vision is out through the tear ducts, and peripheral vision through an opening on the outer edge of each eye. (You can see where the openings are in the raw cast mask above.) Both are hidden with mesh fabric, making it impossible to see in, but quite easy to see out.
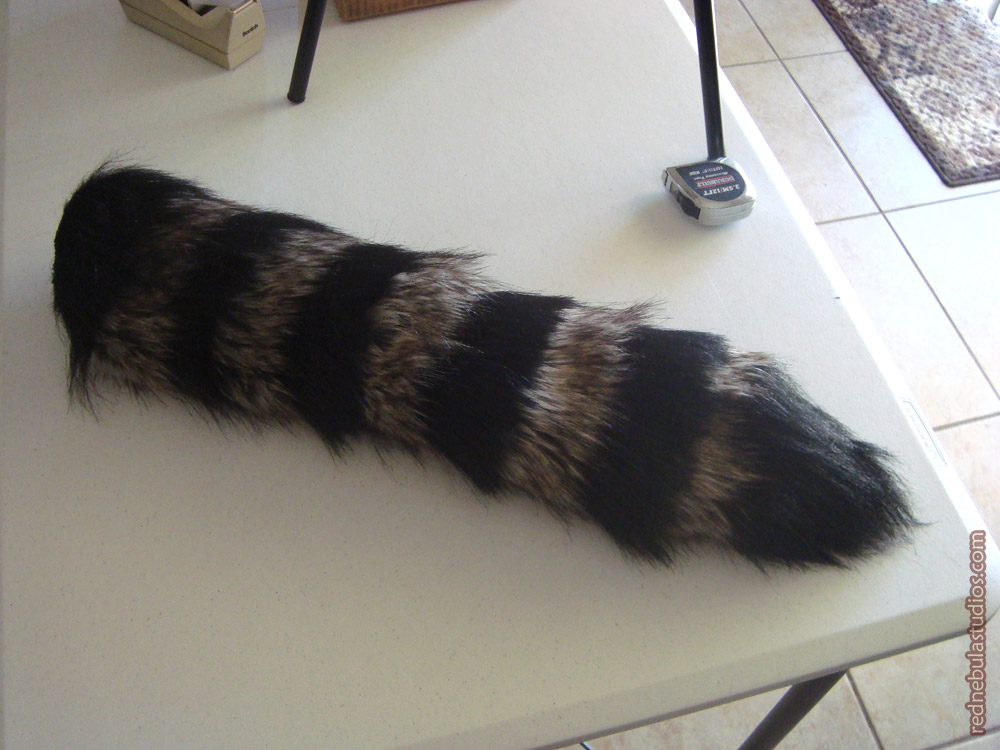
The tail was created by sewing alternating stripes of black and brownish-grey fur together. The finished tail had simple armature inside to give it a nice swing, with sturdy nylon rope running the length of it so it wouldn't come loose or come apart if someone decided to pull on it. (Don't pull on costumers' tails, folks. It's rude.)
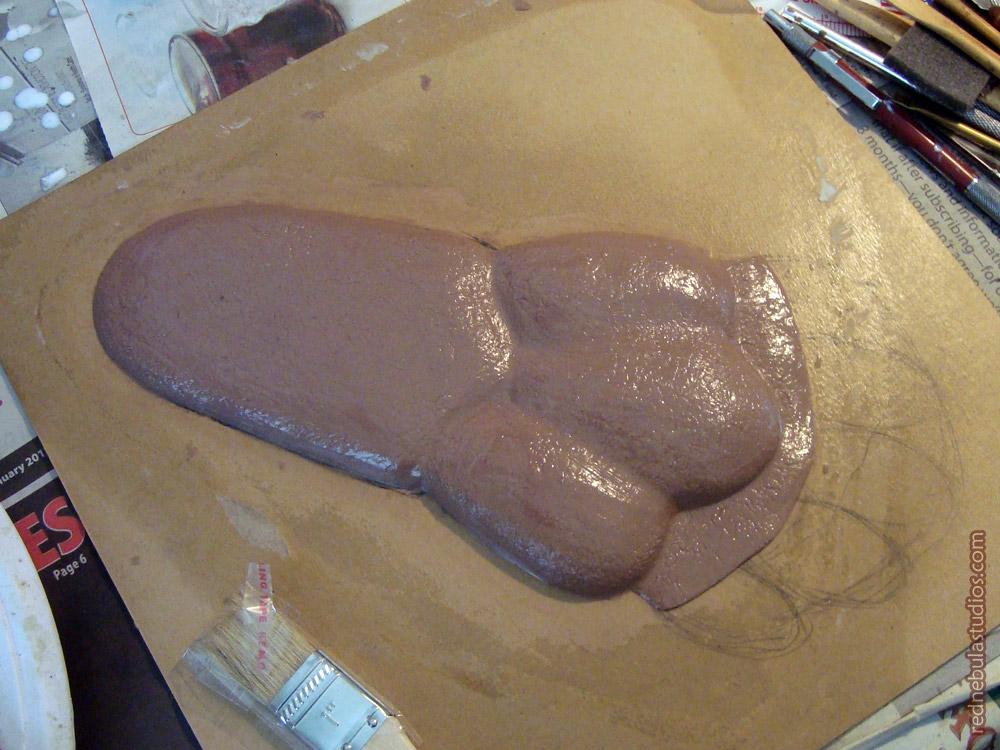

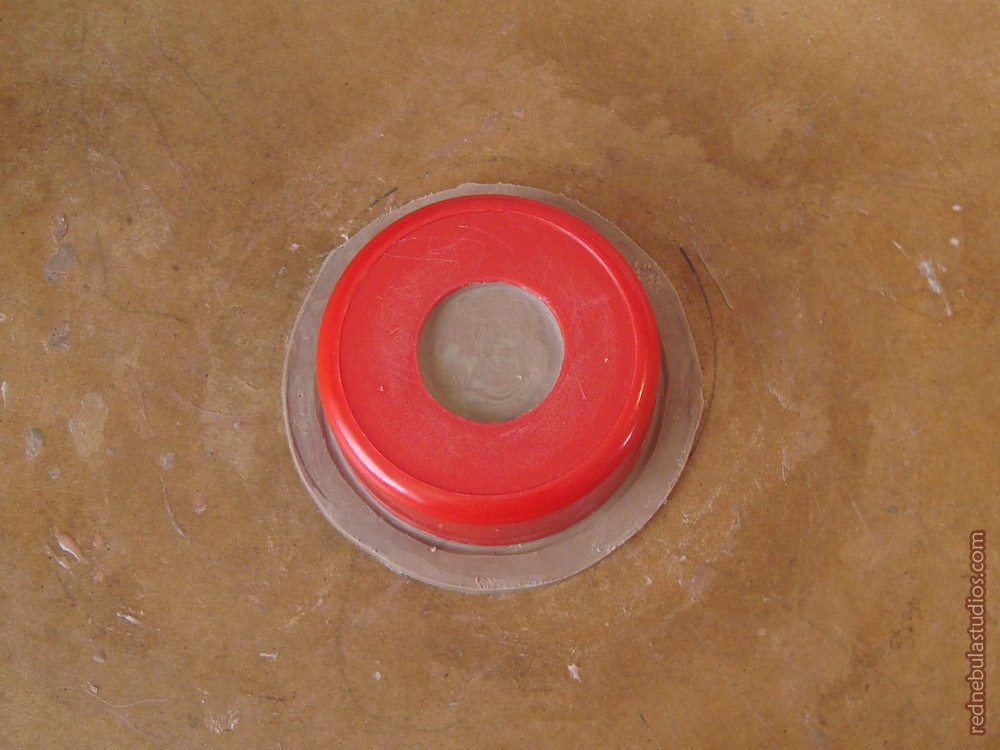
This is the sculpture and epoxy mold for the foot pad. This detail isn't seen by many, but makes the bottom of Rocket's feet look realistic and gives him a unique footprint!
Unlike most molds I make, this one is meant to be cast with silicone, so I made the mold from a hard material: epoxy resin. You might be wondering why it looks so weird and marbled red and black... Well, that'll be because I made a mistake! My EpoxaCoat - an epoxy resin specifically formulated for base coats and capturing detail - had gone bad, so I tried to do my base coat using Epoxamite (black because I added colorant, as it's not so easy to see the clear material otherwise), which is used with fiberglassing. The Epoxamite doesn't handle surface coats well, so the black you see in this mold was the Epoxamite where it pulled away and cured in that marbled pattern. I went and got a new kit of EpoxaCoat (the red parts of the mold) and finished the base layer with that. Luckily, where the Epoxamite HAD cured, it captured excellent detail, and the EpoxaCoat filled in the gaps. So, in the end, it worked out!
The TL;DR version of that is: Use the right materials for the job!
Because this is a fairly simple mold and won't be under any stresses when being cast, I just backed it with FreeForm Air. The one below is done a bit differently.
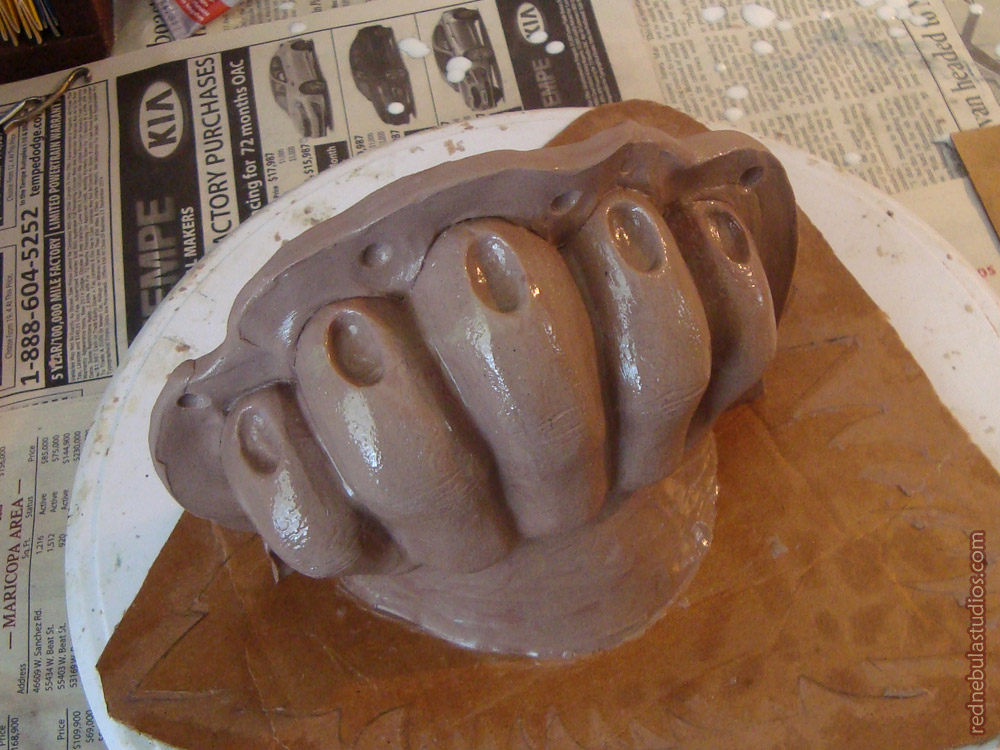
This is the sculpture for the toes, prepped for molding. I'm cheating a little by making my mold wall out of oil-based clay. Usually, you'd use water-based clay to make a mold wall. The wall is also a bit thin to make a significant mold flange. It worked out okay for this little mold, but when I go to make a larger one, it'll need a much thicker wall!


Here's the mold-in-progress (done with fiberglass and Epoxamite over a base coat of EpoxaCoat this time, with a layer of FreeForm Air over the top... which was kind of overkill!), and the finished mold, shown both in two halves and assembled.
The reason I did this one with fiberglass is because a two-part mold has to endure a fair amount of stress, especially when prying the mold off of the original sculpture. Fiberglass makes for an exceptionally strong mold which is still fairly thin and lightweight.
I was in a bit of a hurry to get these costume pieces done before Phoenix Comicon 2015, so I regretfully didn't get more pictures of how the tail and feet were fully assembled. You can see how everything came together in the photo at the bottom of the page, though!
Star-Lord Helm Build
For Star-Lord, the only part I crafted was the helmet, but it was quite a build - not my usual style, so there were some challenges, but I'm very pleased with the result!


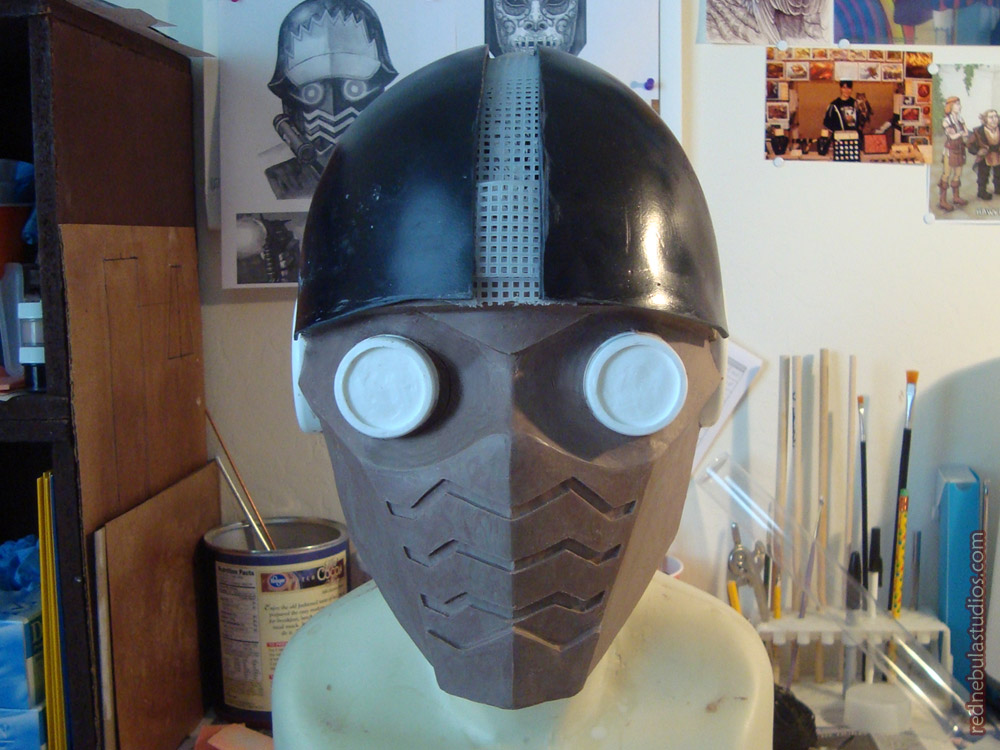
My friend Allen hooked me up with a casting from one of his helms, which would need some heavy modification to work for this piece. As you can see here, I started by sawing out a chunk of the middle to make the helm narrower, and rounded pieces on either side where the ear pucks would be situated.
Meanwhile, I began work on the oil-based clay sculpture for the face plate.
An ear puck was created using the lid of a conveniently-shaped plastic coffee container, which I cut a hole out of the middle and modified using clay. I made a mold of this piece and cast it twice to get the ear pucks for the final helmet.

As I continued to work on the clay sculpt, I used the cast ear pucks to make sure I had the overall shape right. The eyes were created in a similar fashion. If you've got multiple parts of a mask that need to look identical - especially such a fiddly shape as a perfect circle! - it's really helpful to pre-build the piece, mold it, and cast multiple copies. (see Tip: Using Pre-made Objects while Sculpting)

I built a base for the remaining modifications to the helm out of that simple plastic mesh used for yarn work. It's an easy material to cut and work with, and makes a decent base for sculpting over.


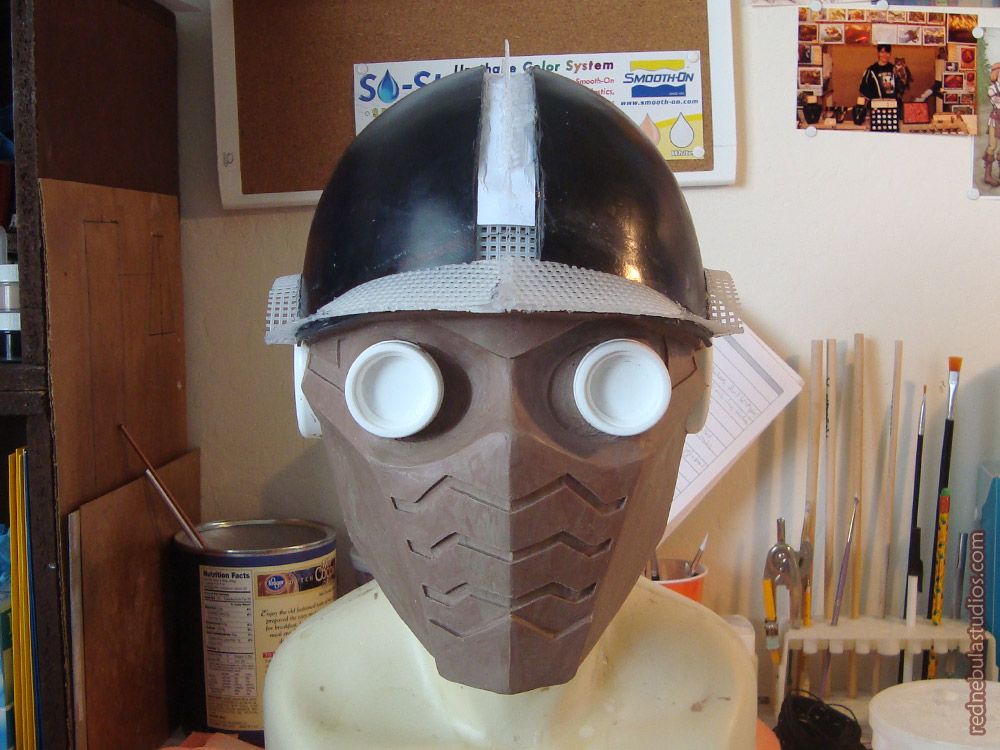
The first picture shows the modified helm after I sculpted on FreeForm Air over the plastic mesh and went a few rounds with primer and sandpaper. I still was not happy with the overall shape, and felt the helm needed to be a wee bit larger to be comfortably worn as well. So, I covered nearly the whole thing in a layer of clay to get the result I wanted! This also gave me an ideal opportunity to sculpt the starburst on the front of the helm.
The final picture shows the mold I made of the helmet, done in Rebound 40 rather than my usual go-to, Rebound 25. The main reason I went with 40 this time was because my supplier was out of 25. The two work similarly. Both are brush-on platinum cure silicones. Rebound 40 has a higher durometer (the measure of how flexible or rigid a material is), so 40 is a little less flexible and elastic than 25. For a mold like this one, that's just fine! It's hard to see in the photo, but there's also a two-part mother mold encasing the silicone, made from FreeForm Air.

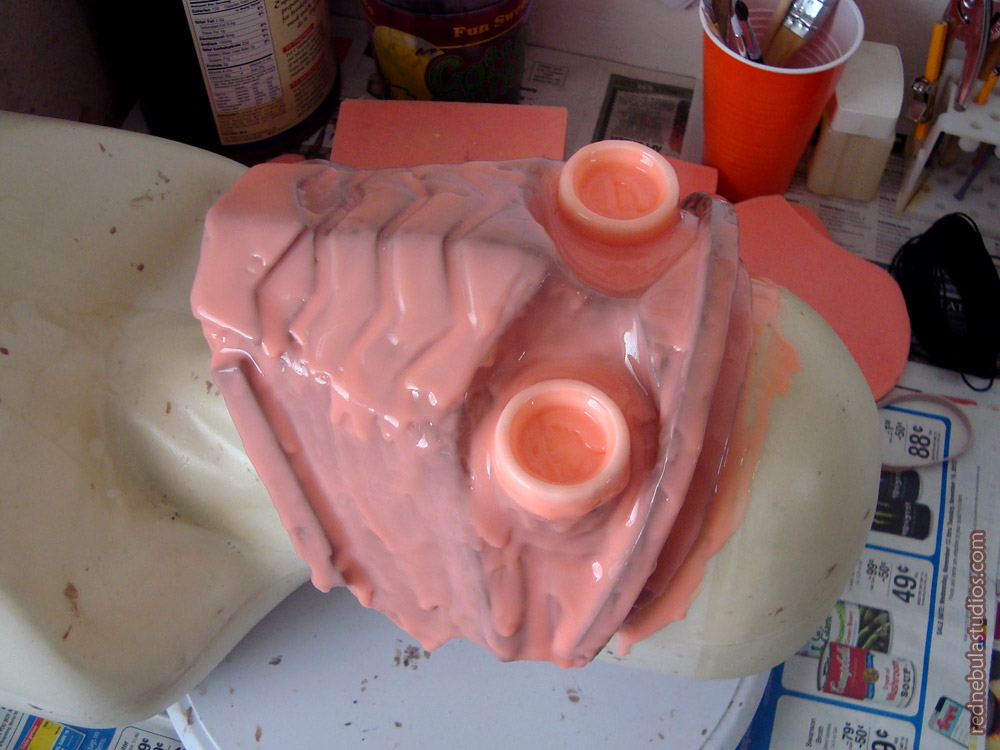
For the circular parts of the eyes, I went with laser cut and etched acrylic (done through Ponoko). Here, you can see the pieces being tested in place. There's also one of the breather canisters getting a test fit, which I crafted from PVC pipe, molded, and cast to make this piece.


Here's the final sculpture of the face plate, ready for molding. The eye pieces became part of the final mold, whereas the ear pucks and canisters were separate. You can see the keys on either side of the mask's jaw where the canisters will fit in place.
Mold in progress...


Here's the final cast faceplate being tested out both with the canisters and with the full helmet.

Once everything was assembled, I masked off each section in turn to paint it. Some parts, like the face plate, also got some antiquing with black acrylics.

And, voila! Here's the final helm all assembled, painted, and... lit? Naturally, I failed to get pictures while I was putting the lighting system together! A 9v battery is housed in a little compartment in the forehead, above where the faceplate meets the helmet, which keeps it apart from the wearer. There are 10 LEDs in total: Two for the eyes, one for each canister, and three on either side of the front mouth panel.

Categories: Commissions (Not currently open), Costuming, Masks and Props
Tags: animal, characters, comic book, commission, cosplay, costume, fursuit, GotG, Guardians of the Galaxy, helmet, mask, raccoon, Rocket, Star-Lord
Live Date: 5/18/2015 |
Last Modified: 5/18/2015