Matrix Mold: Owl Mask, Part 4: Silicone
Sarrah Wilkinson - 6/23/2022
In the last blog, I covered creating the mother mold shell for the owl mask matrix mold. In this one, I'll be setting up the mold shell for pouring the front and back halves of the silicone mold itself.
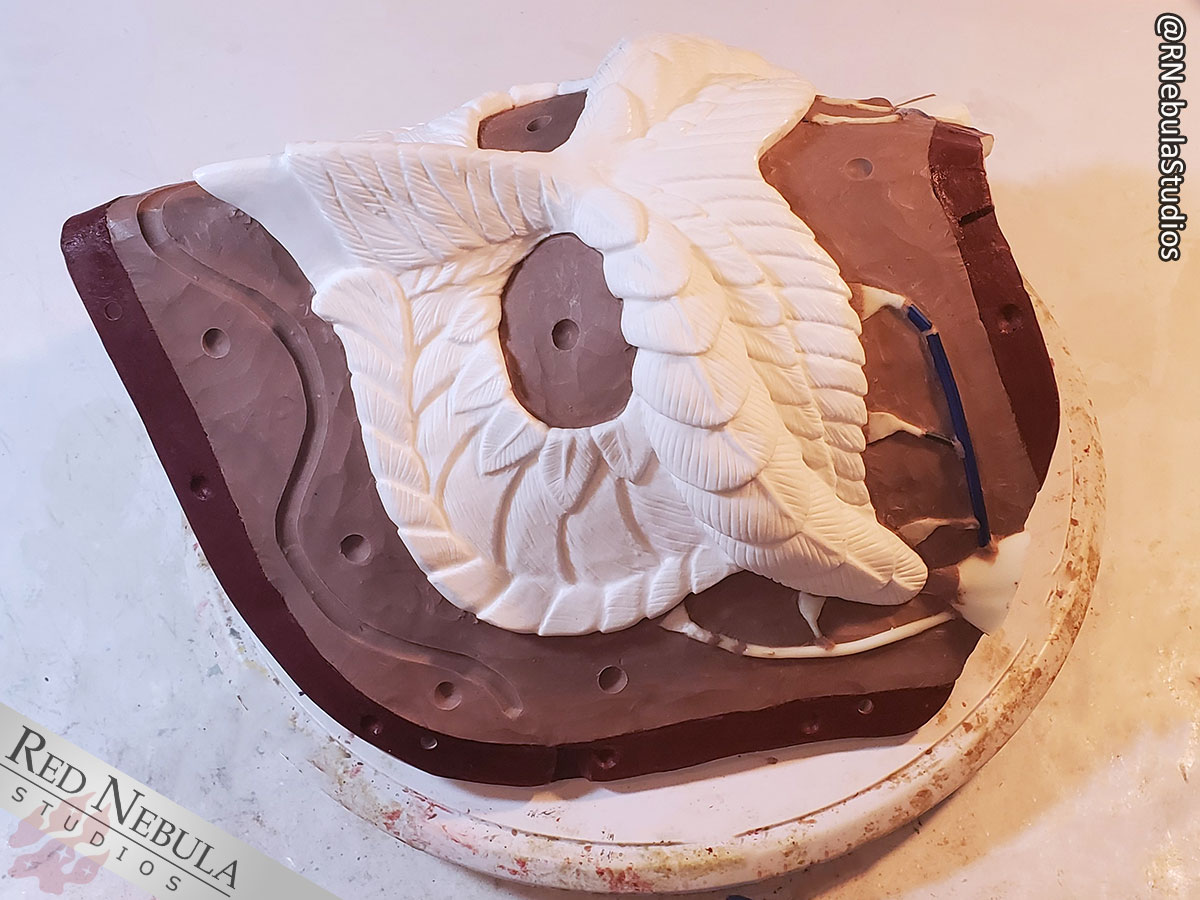
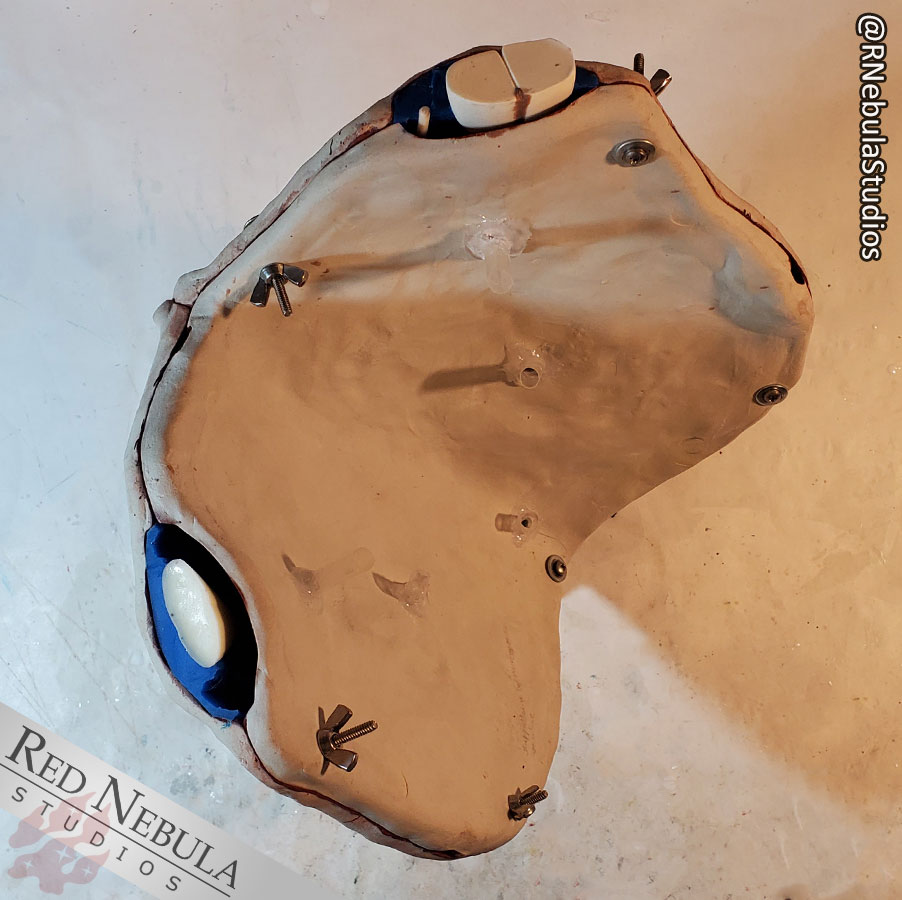
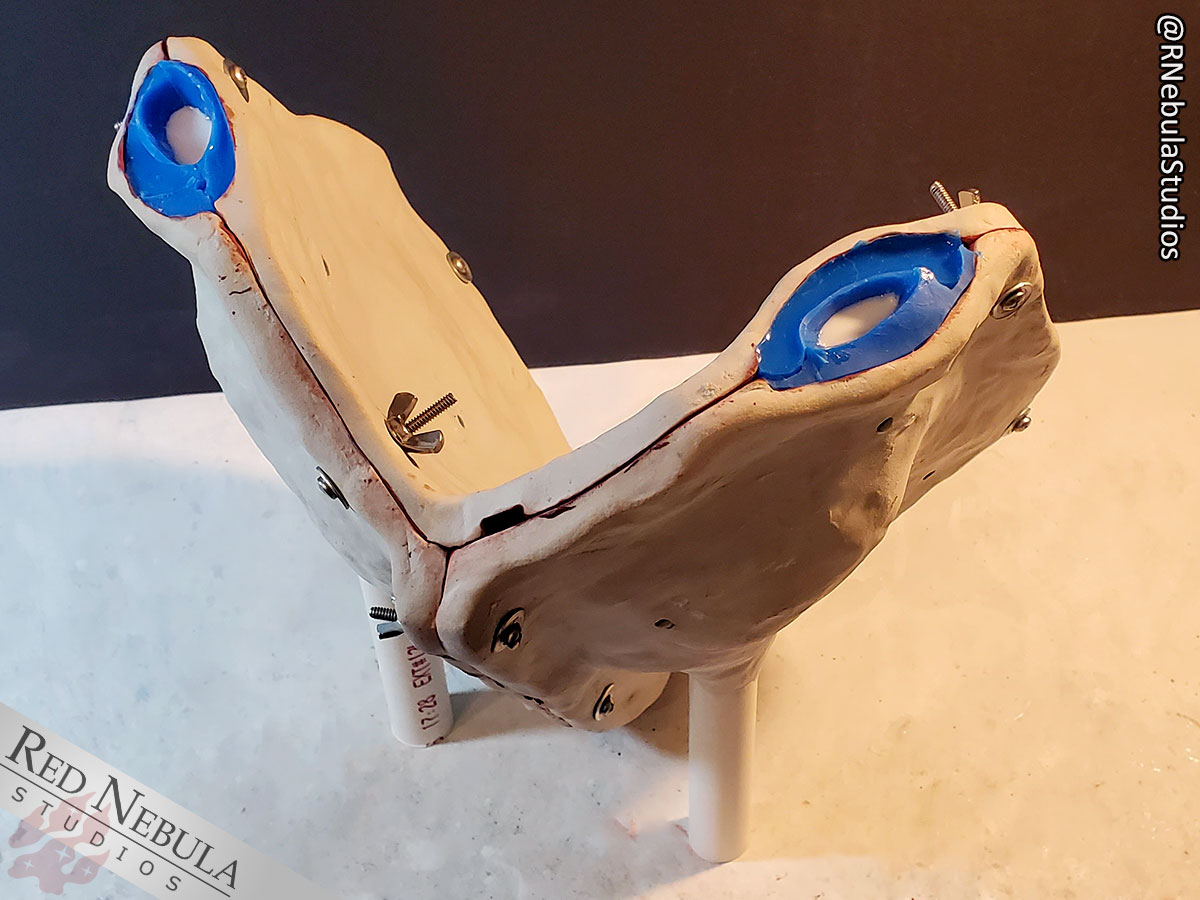
As I mentioned at the end of the last part, I left most of the clay on the back half of the mold shell, as it allows me to place the resin owl mask in exactly the right position so it is 'floating' between the front and back of the mold shell.

Then, I build up clay around the owl mask and add in pieces for my pour spout and venting. At this point, I would like to apologize for being a complete derp and forgetting to take a picture of what the whole pour spout and vent system looks like! You'll be able to see the whole thing in a later photo after the silicone is poured, but here you can see at least one half of it, as well as the keys I've carved into the clay.
For the front half of the mold, I completely clean out all remnants of clay, first by peeling the clay out as much as possible with my fingers and with sculpting tools (I prefer wooden tools to metal for this, to prevent any damage to the mother mold.) When I've removed as much clay as possible, I finish up by scrubbing the rest of the clay remnants off using mineral spirits and a firm-bristled brush, like a chip brush.
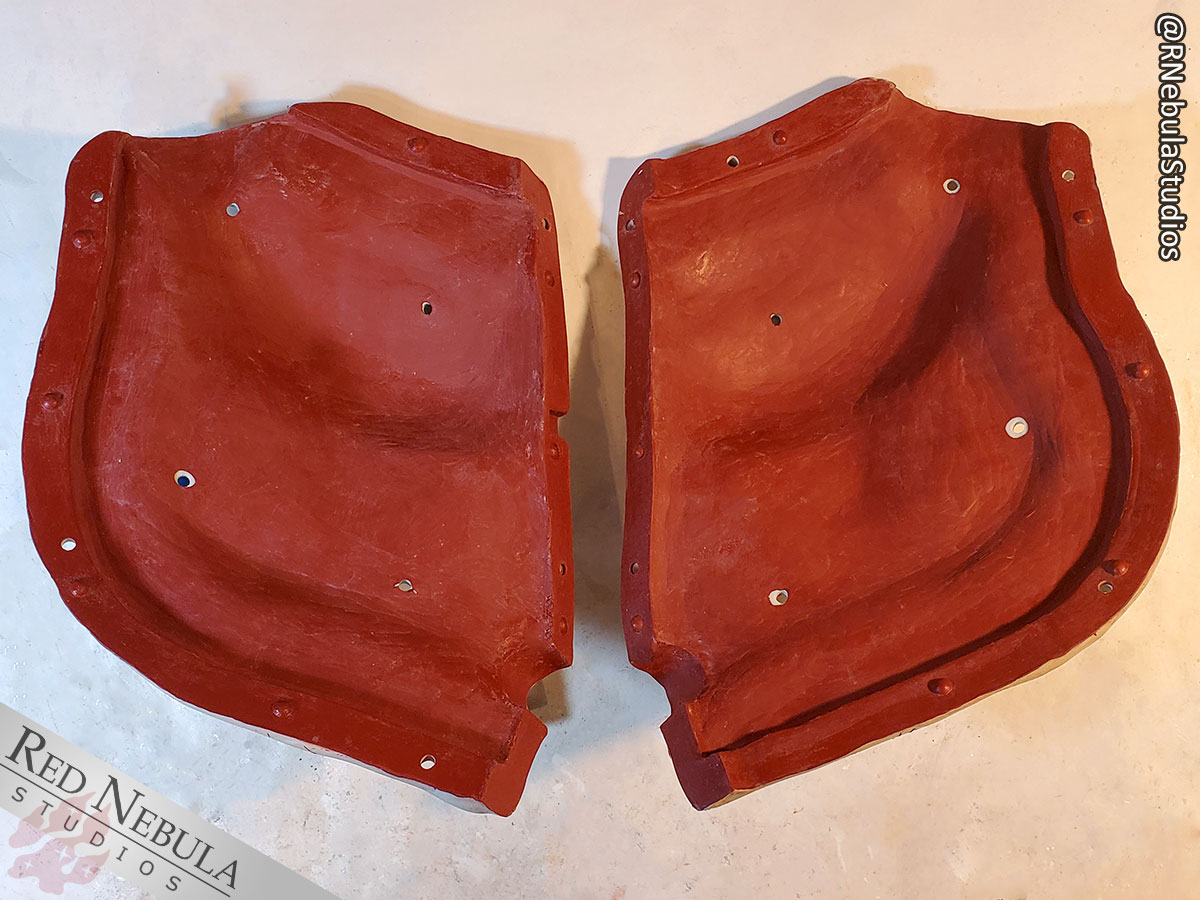
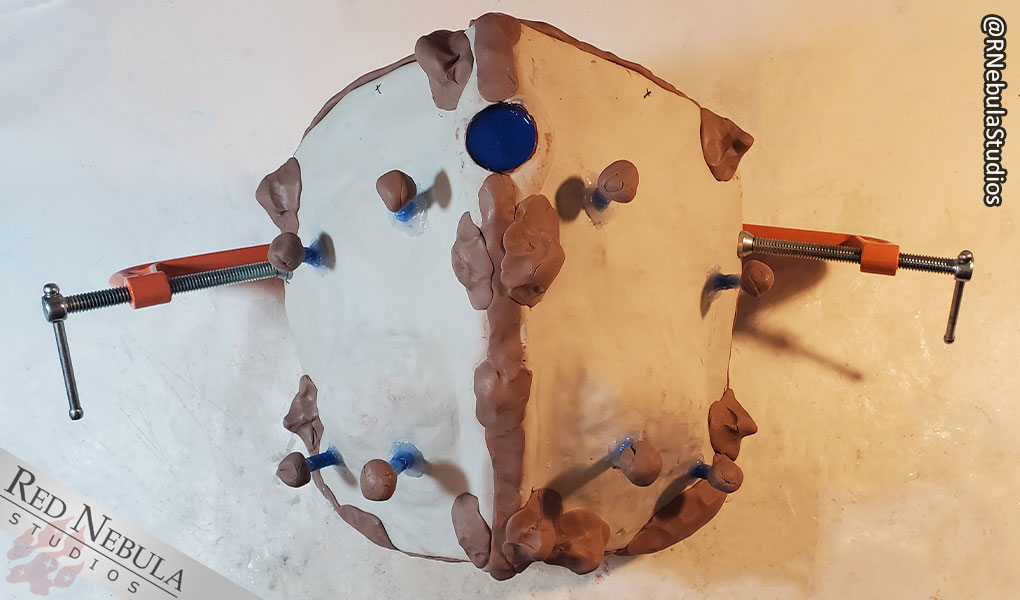
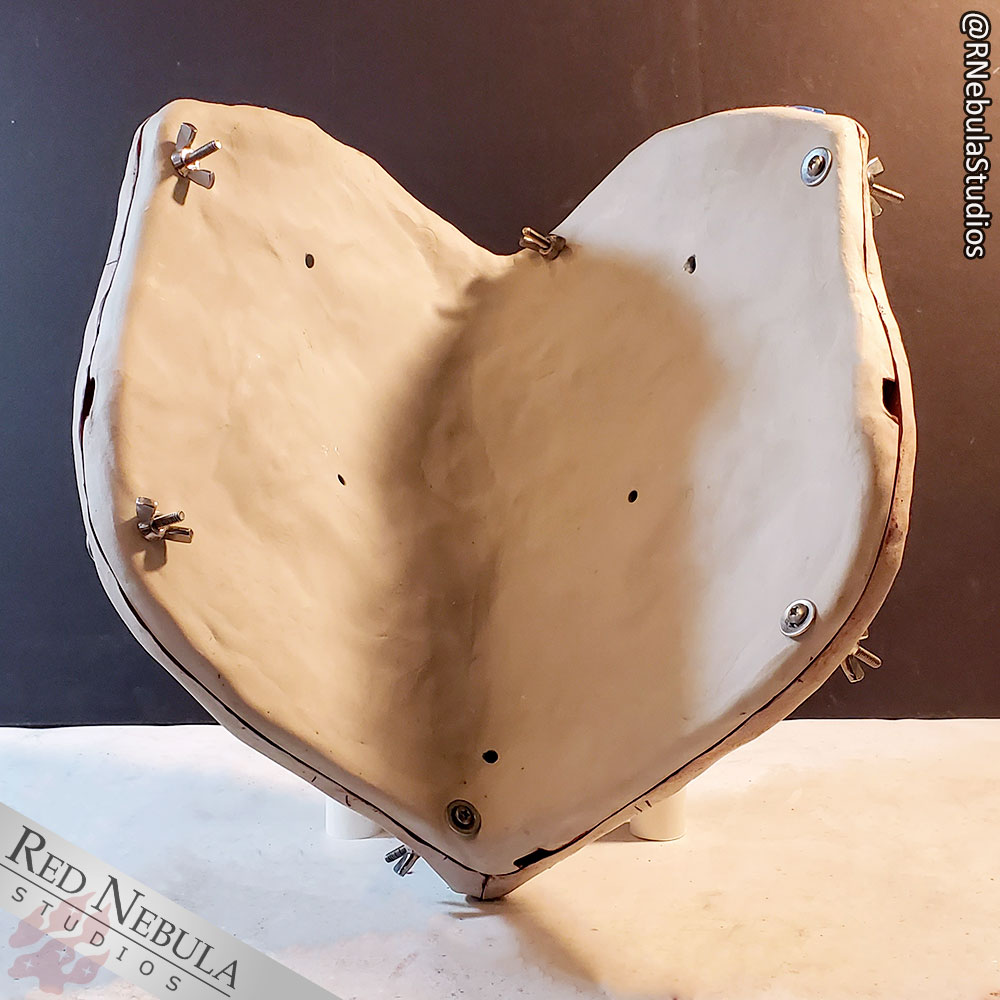
Here, you can also see where I've used a handheld power drill to drill holes along the mold edge to hold the pieces together, and a few holes in the mold shell itself, which will act as venting for when I pour in the silicone.
|
|
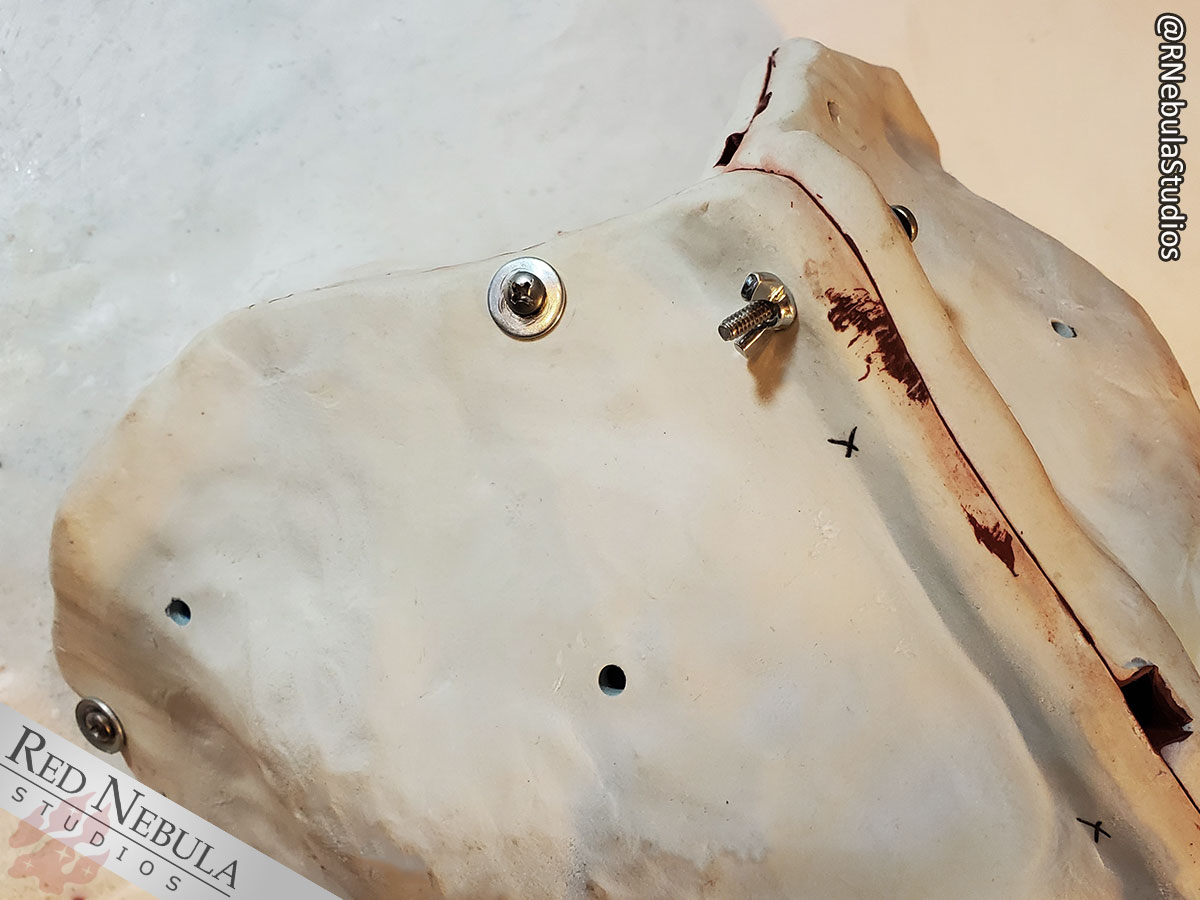
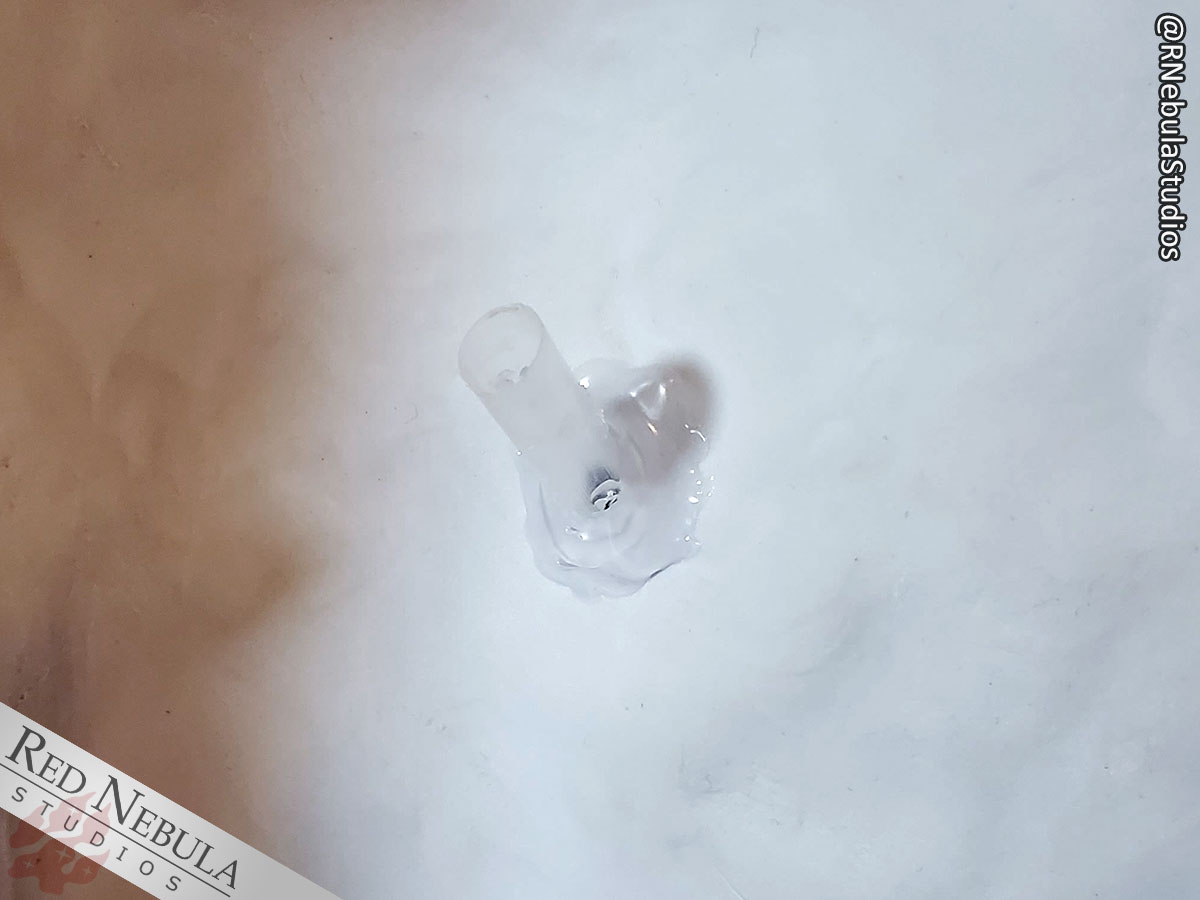
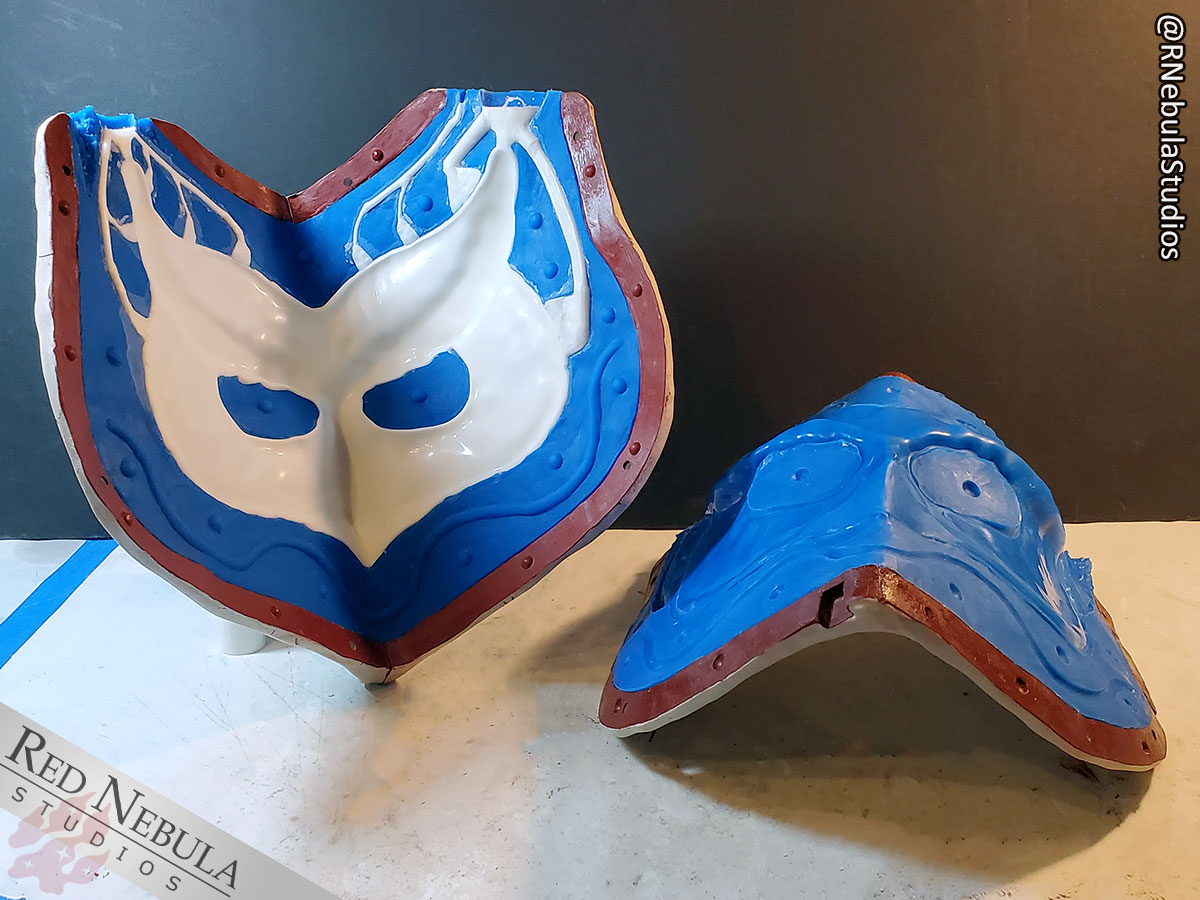
On the left, you can see what the mold shell looks like from the outside, using screws with wing nuts to hold the pieces of the shell firmly together. The holes that do not have screws in them are for silicone venting. On the right, I use hot glue to attach a short length of transparent drinking straw around each of the vent holes.
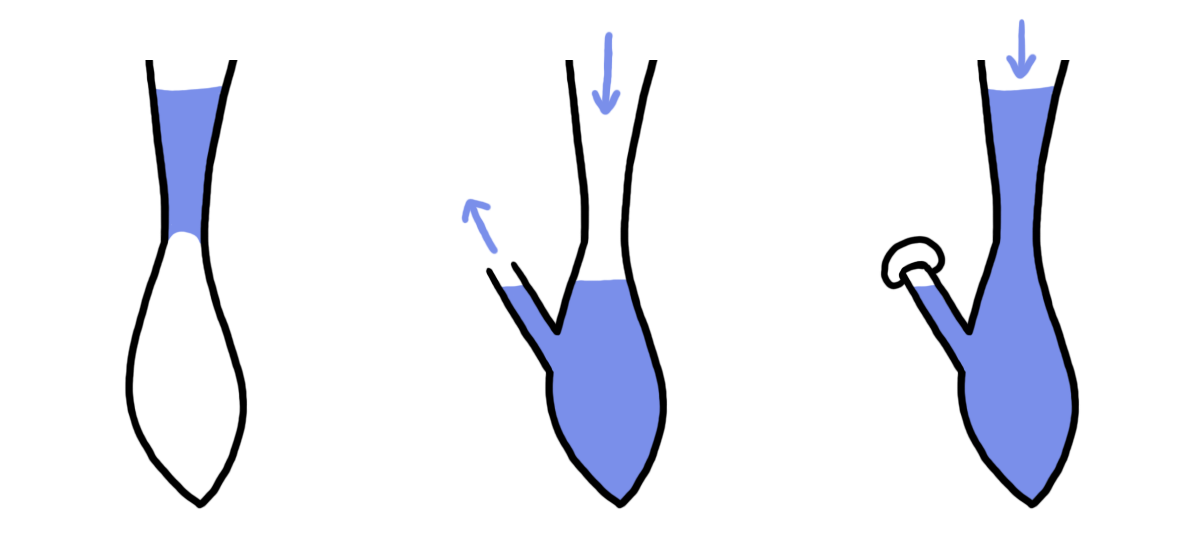
This diagram illustrates how the straw vents work. A thick, viscous liquid like silicone may trap air as it's being poured into a mold cavity, especially if there's a relatively thin area. While the air may sometimes bubble out, it doesn't always have a chance before the silicone begins to set. It's best to plan a series of vents to make sure air escapes and the silicone gets everywhere it needs to be. The hole forms a temporary air vent, and the straw keeps the silicone from just spilling out all over the place once it gets to the hole! As soon as the straw starts to fill up with silicone, I cap it with a small piece of oil-based clay.
Before I pour in the silicone, I close the mold and use screws with wingnuts to hold it all shut, as shown a few pictures back. Here, you can see that I also use clay to cover the two large holes at the top of the mold, the seam between the mold shell pieces, and any possible silicone escape points. Liquid silicone - in this case, Mold Star 30 (another product from Smooth-on) - can sometimes seep through some pretty thin crevices! The clay is great at making the seal airtight and preventing this.
For this particular mold, I also used a pair of clamps to tilt the mold shell a little so the silicone would flow down from the beak area up around the brow and 'horn' regions.
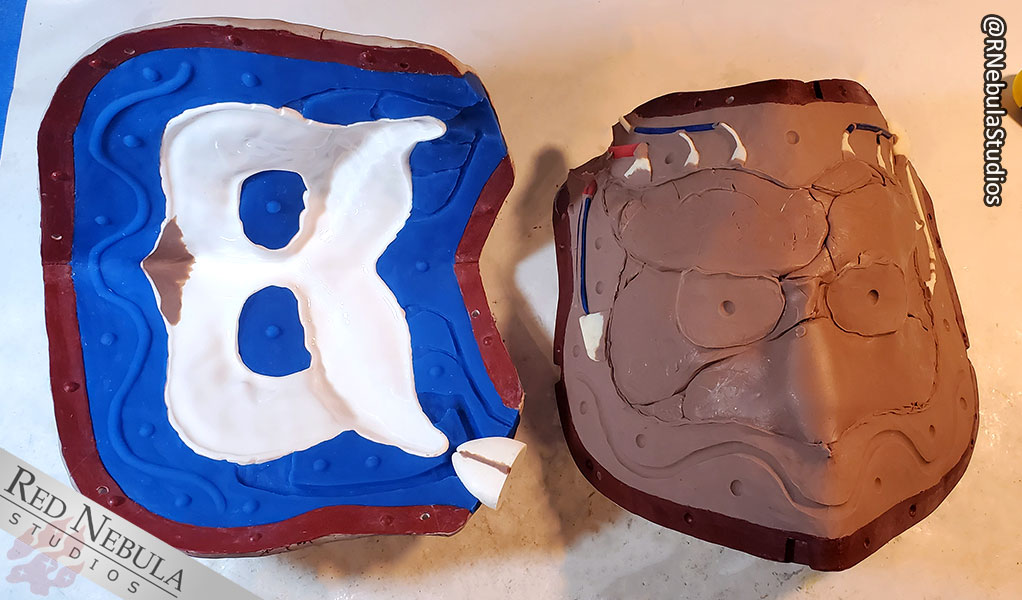
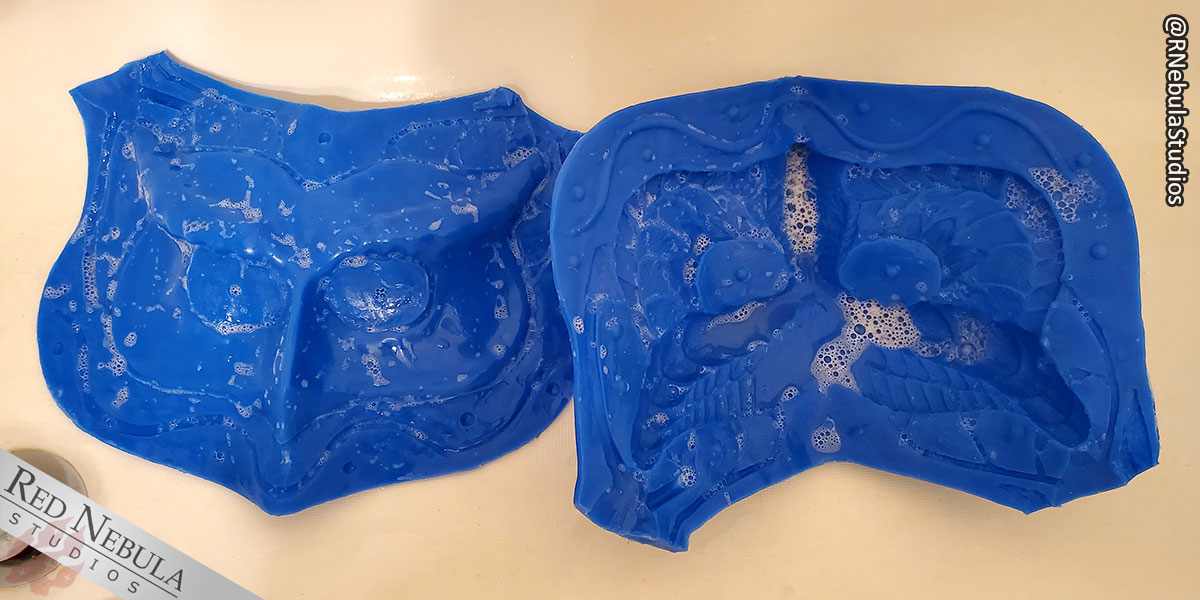
In the photo, you can see that the first half of the dark blue silicone material has been poured. The straw vent holes were capped with clay as they filled up with silicone, ensuring there were no hidden air voids in the mold.
|
|
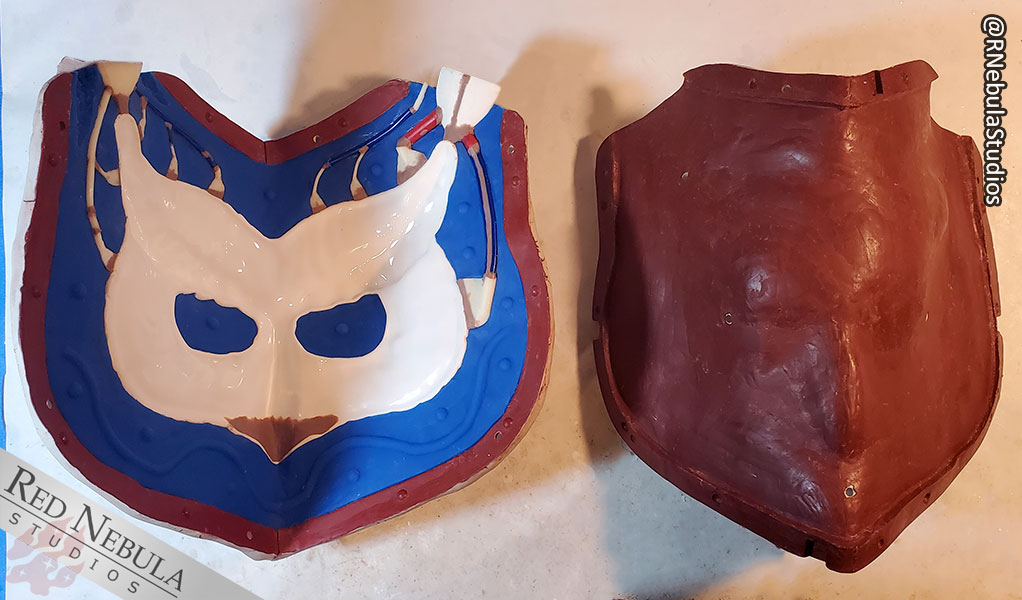
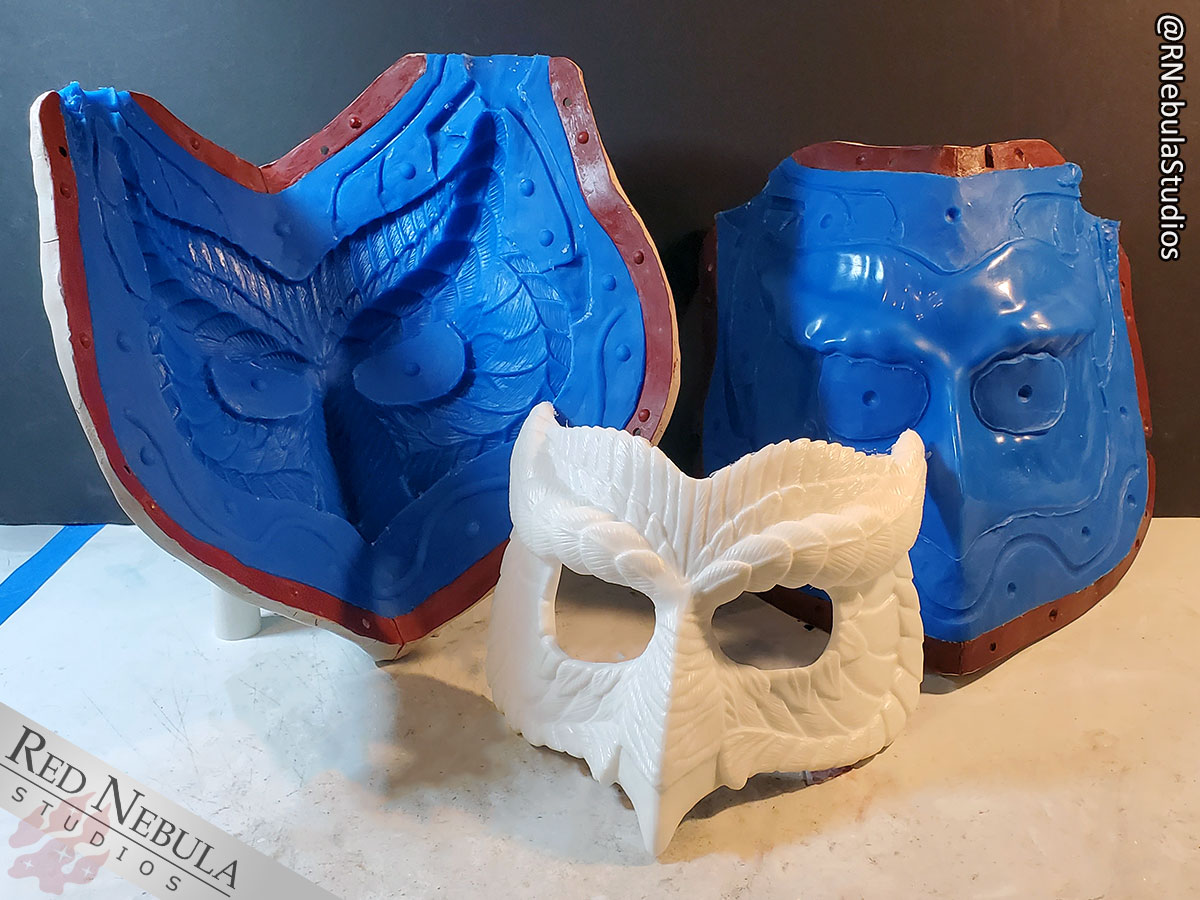
The silicone is allowed to cure overnight, then I open the mold back up. Suction between the newly-cured silicone and the clay means those pry points will come in handy here too! And fortunately, because the resin mask has a large enough surface in contact with the silicone, suction will almost always keep it stuck to the silicone too. Sometimes the pour spout and vent pieces will be attached to the silicone too, other times they'll remain stuck in the clay. All of these pieces are moved over to the silicone and the clay completely cleaned from the other side, as you can see in the photo to the right. I use a bit of petroleum jelly as a kind of temporary 'glue' to hold the pieces on the silicone side.
(And as promised, here you can finally see the layout of my full pour spout and vent system, which I make using spare resin pieces, clay, straws, lengths of wire... any material that doesn't inhibit your silicone will work.)
Once everything is cleaned up, I apply mold release (petroleum jelly) to all exposed silicone, then close the mold back up.
Do not, I repeat, DO NOT forget mold release! Otherwise the silicone will stick to itself and you'll have to cut the whole thing apart.
The second half of the silicone will be poured down from the top of the mold, in through the gaps around the pour spout and vent.
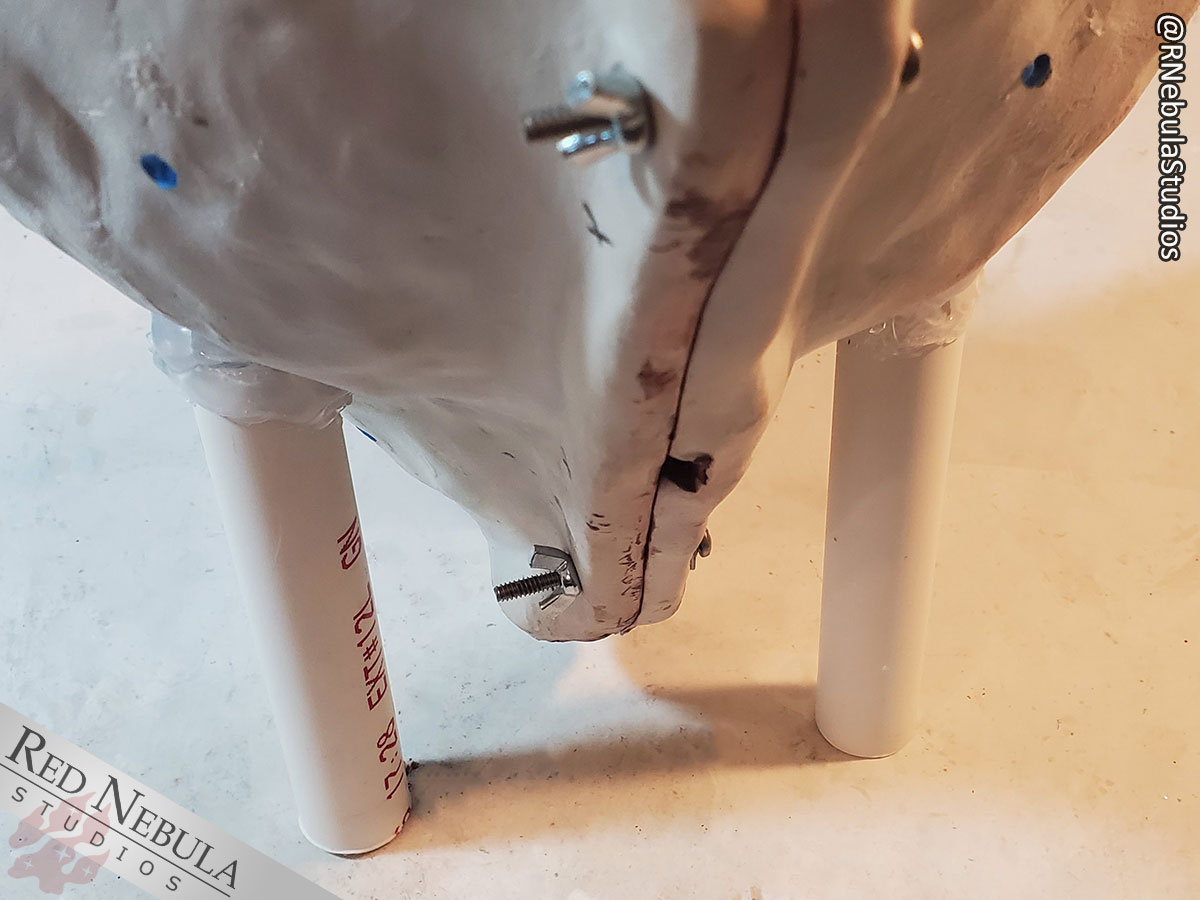
The mold will need to be upright for this part - and in fact, this upright position is also how the finished mold will be cast. So, at this point, I add a pair of supports to keep the mold standing up properly. The supports are lengths of PVC pipe, attached with hot glue. It's a temporary structure at first, which I'll reinforce once I've cast the mold a couple times and am satisfied everything's working properly.
When everything's set up, I seal all the seams between the mold shell pieces with clay again and pour in the silicone, just like the front half.
Once the silicone has cured overnight, I open it all up, use a pair of small, sharp scissors to clean up the silicone edges, and give the new mold a nice scrub using dishwashing liquid to remove any residue from the moldmaking process.
|
|

Here's the final owl mask matrix mold. At this point, I've had a chance to test the mold and am satisfied with how it casts, so I went ahead and reinforced the PVC pipe supports with some FreeForm Air epoxy putty.
I went through over half a dozen types of resin when testing what would work best for casting my matrix molds, and the one I like the best is called Task 9, one of Smooth-on's specialty resins. It's a 1:1 mix ratio urethane resin that cures clear, so I can color it with mixed-in pigments. It has a relatively low viscosity and a lengthy working time, which makes it easy to pour into the mold. The final cast is also incredibly strong and durable! My testing process involves throwing it onto concrete from 6 feet in the air, so when I say strong, I mean it.
On the downside, it does tend to bubble during the curing process, so a pressure pot is an unfortunate necessity. With a pot, however, the casts come out bubble-free and... basically perfect. This is why, despite the lengthy process of making matrix molds, I love them so much and will continue converting all of my other masks.
The liquid resin is colored - white in this case - and mixed, then poured in through the pour spout until it begins to seep up through the air vents on the other side.
I place the whole mold in my pressure pot at 60 PSI for a little over an hour. It cures faster during the warmer months of the year. After that, the resin is cured enough that I can open up the mold. It's still just a little soft, which makes it easy to remove the pour spouts and air vent sprues.
And with that, we've got a finished matrix mold and a successful cast!
I hope you enjoyed this series on how I go about converting my masks into matrix molds, and it gives you some ideas for how you might want to handle your own molding and casting situations. Or, maybe you are just interested in the process my pieces go through! In any case, it was fun getting a chance to share this process. Go make some awesome things!
Love the owl mask? You can buy one via the link below!
All blogs in this series are linked from the Making a Matrix Mold page.
If you found this helpful, consider leaving us a tip or becoming a Patron! Your generosity helps our small business thrive.
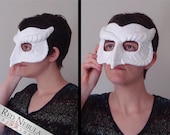
$62.00 via Etsy
Categories: Costuming
Tags: converting, matrix mold, mold shell, Mold Star 30, monster clay, mother mold, oil-based clay, owl, owl mask, pry point, resin, resin mask, silicone, silicone mold
Live Date: 6/23/2022 |
Last Modified: 9/29/2022