Matrix Mold: Owl Mask, Part 3: The Mold Shell
Sarrah Wilkinson - 6/13/2022
In the previous post, I talked about how to set up the clay structure I use to form the matrix mold's outer shell, or mother mold. In this blog, I'll be creating the shell.
|
|
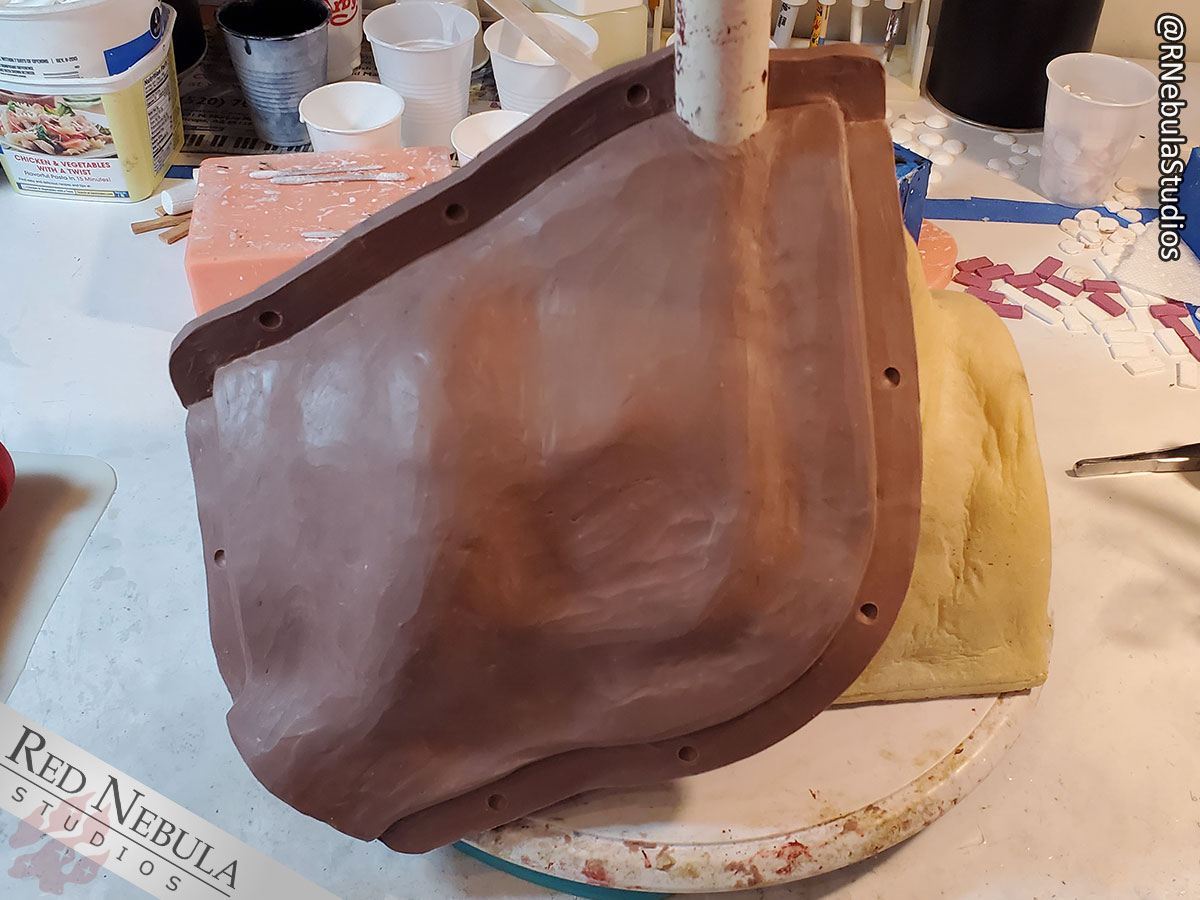
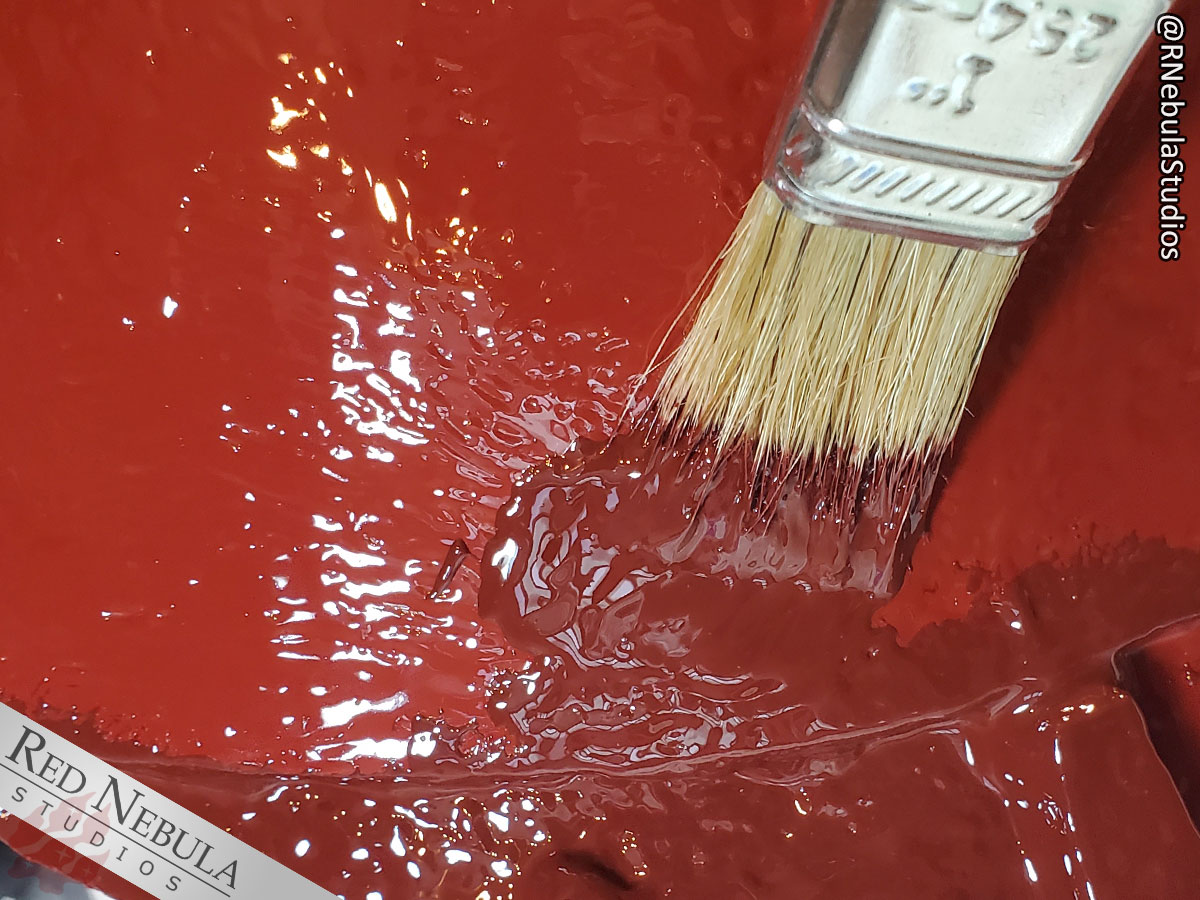
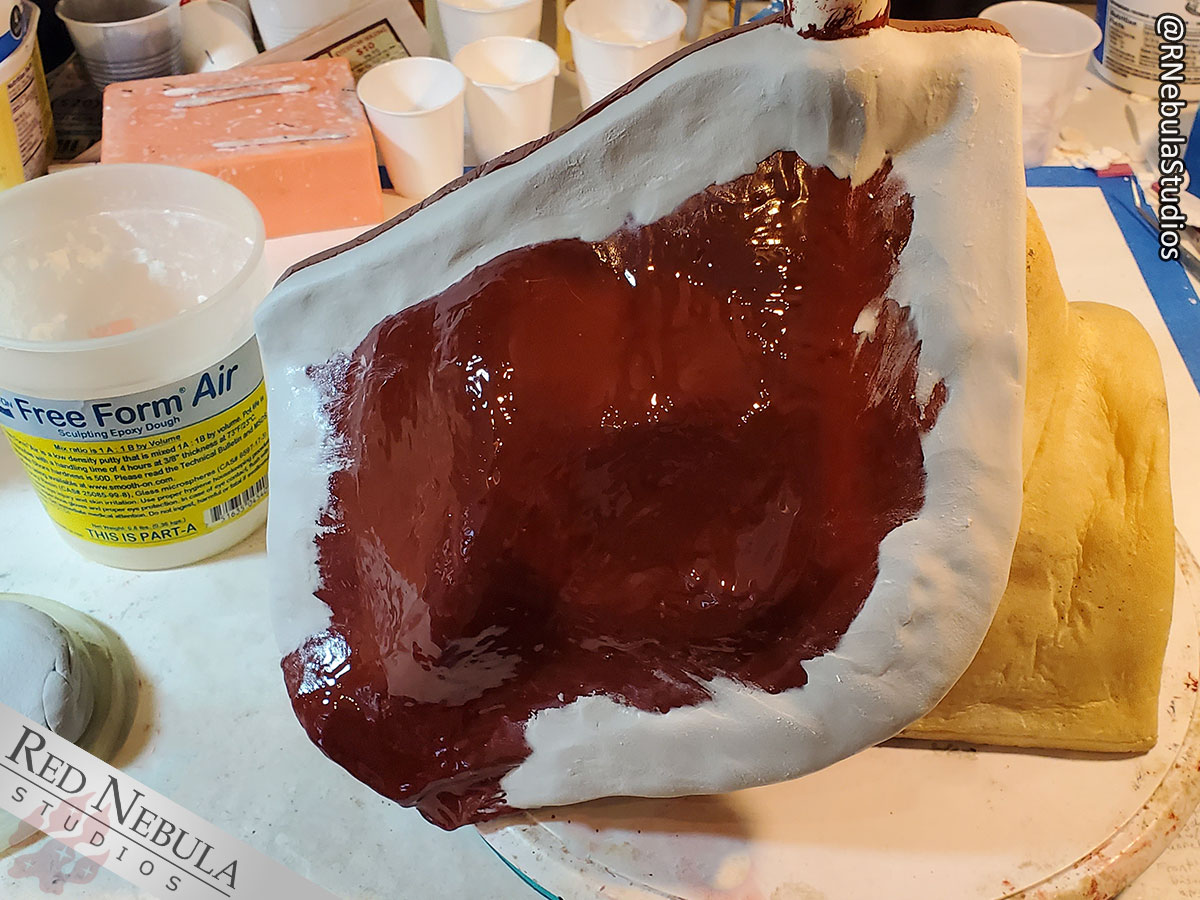
On the left is where I got up to last time. Using a chip brush, I apply a layer of a type of brush-on epoxy called Epoxacoat, available from Smooth-on. It comes in a couple of colors, but they act identically aside from their color. I prefer the red, for purely aesthetic reasons! It is important, however, to use a material that is made to be brushed on - normal epoxy resin or polyurethane resin might not stick long enough to cure properly!
You can use a spray-on mold release on the clay prior to applying the epoxy, but I've found it doesn't make a lot of difference - the clay and epoxy will stick to each other quite a bit regardless. I do apply a mold release to the PVC pipe so the epoxy doesn't stick to it permanently. There are several types of mold release you can use, but I typically just stick with petroleum jelly for this - cheap and readily available!
|
|
Here are a couple of useful tricks.
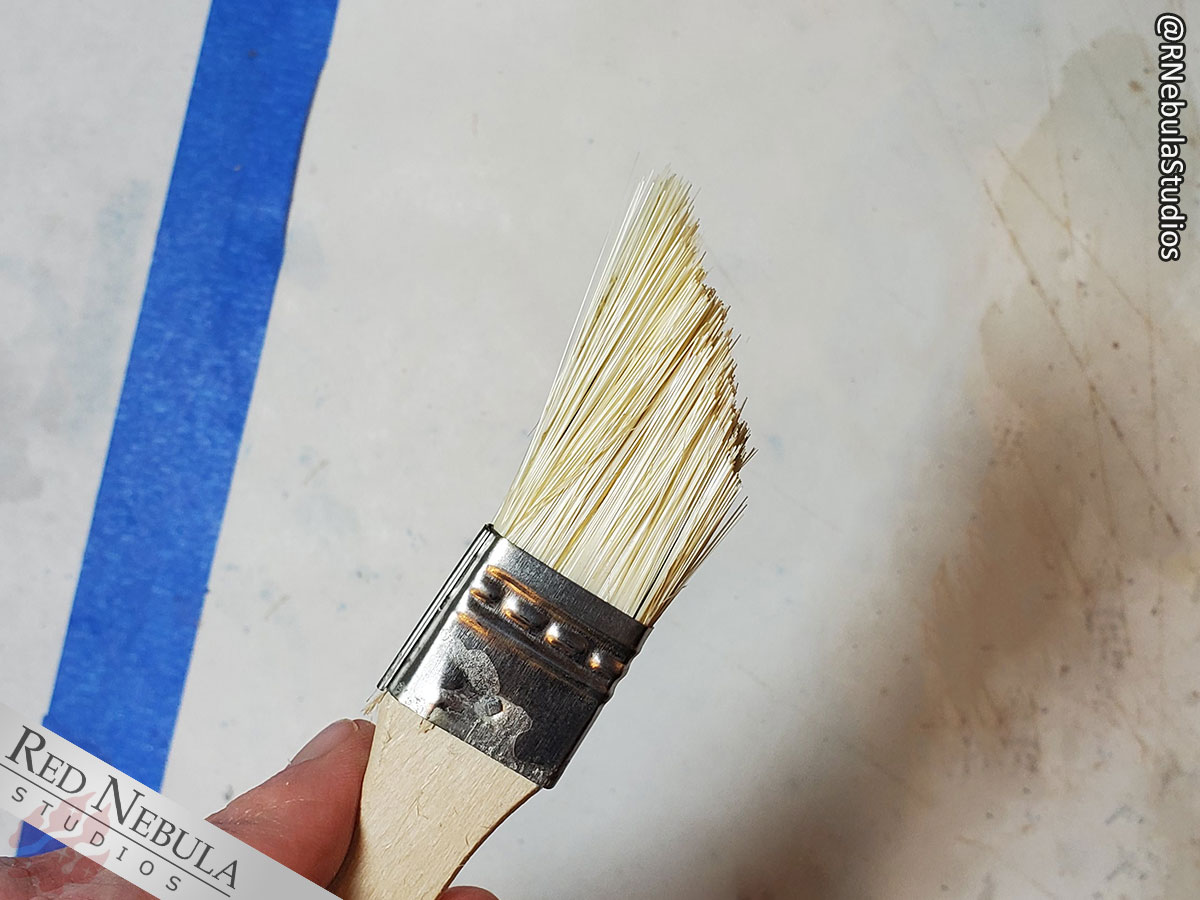
First off, to help paint the epoxy into corners, I like to cut my chip brush into a wedge shape for the first coat. The long edge still works to paint wider sections of epoxy material, but the pointed end can get into small crevices easily.
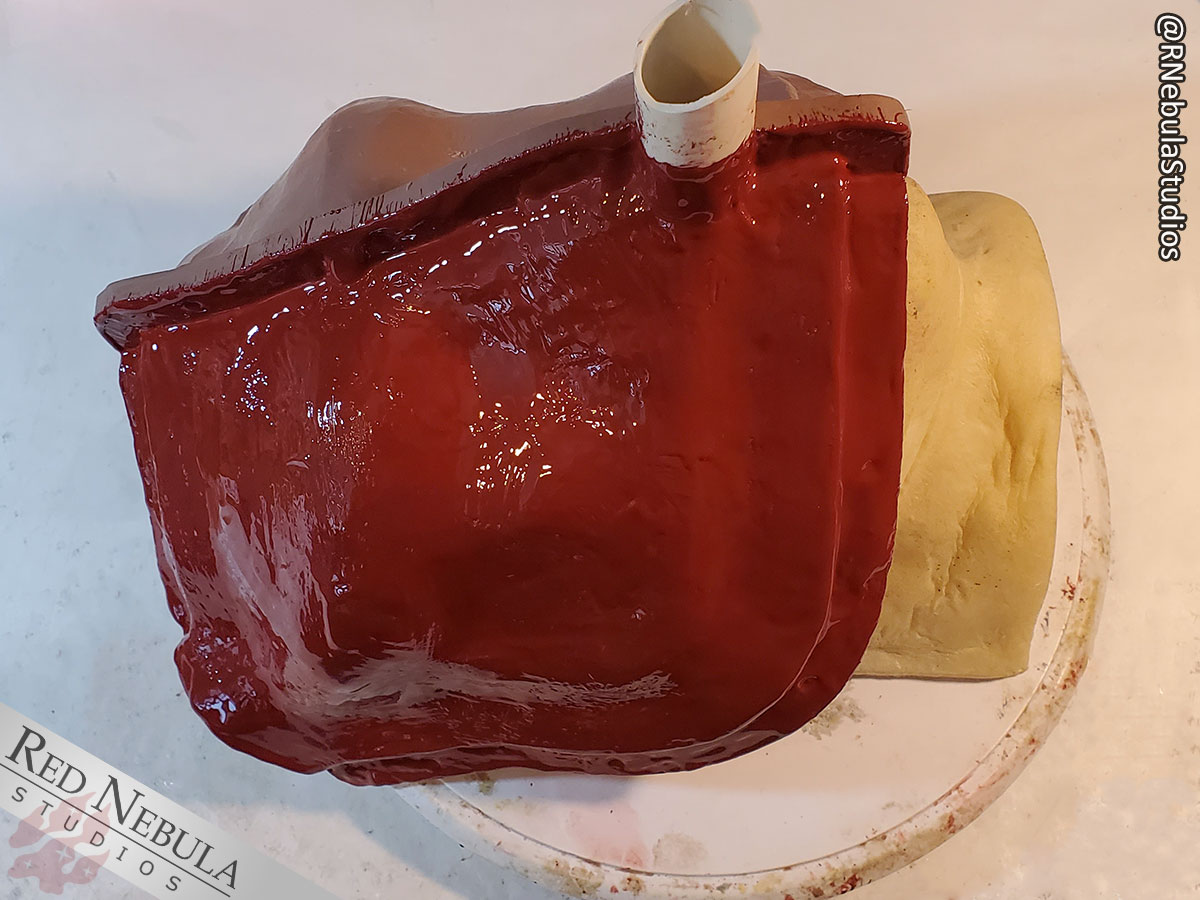
Secondly, I do two coats of epoxy. I find that the first coat doesn't always cover completely and sometimes leaves thin spots. When I do the second coat, I add in just a couple drops of black colorant (So-Strong Black, also from Smooth-on), which makes it very easy to see the difference between coats.
|
|
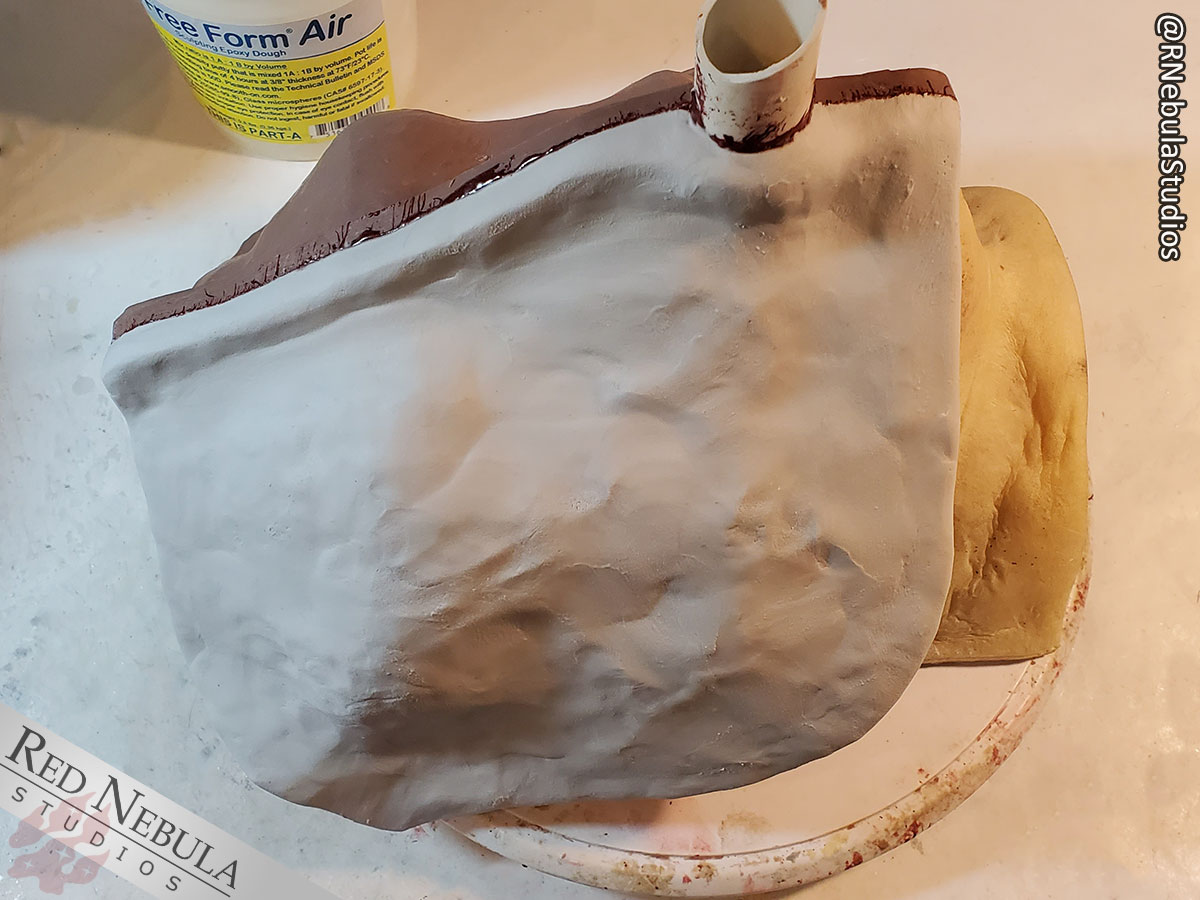
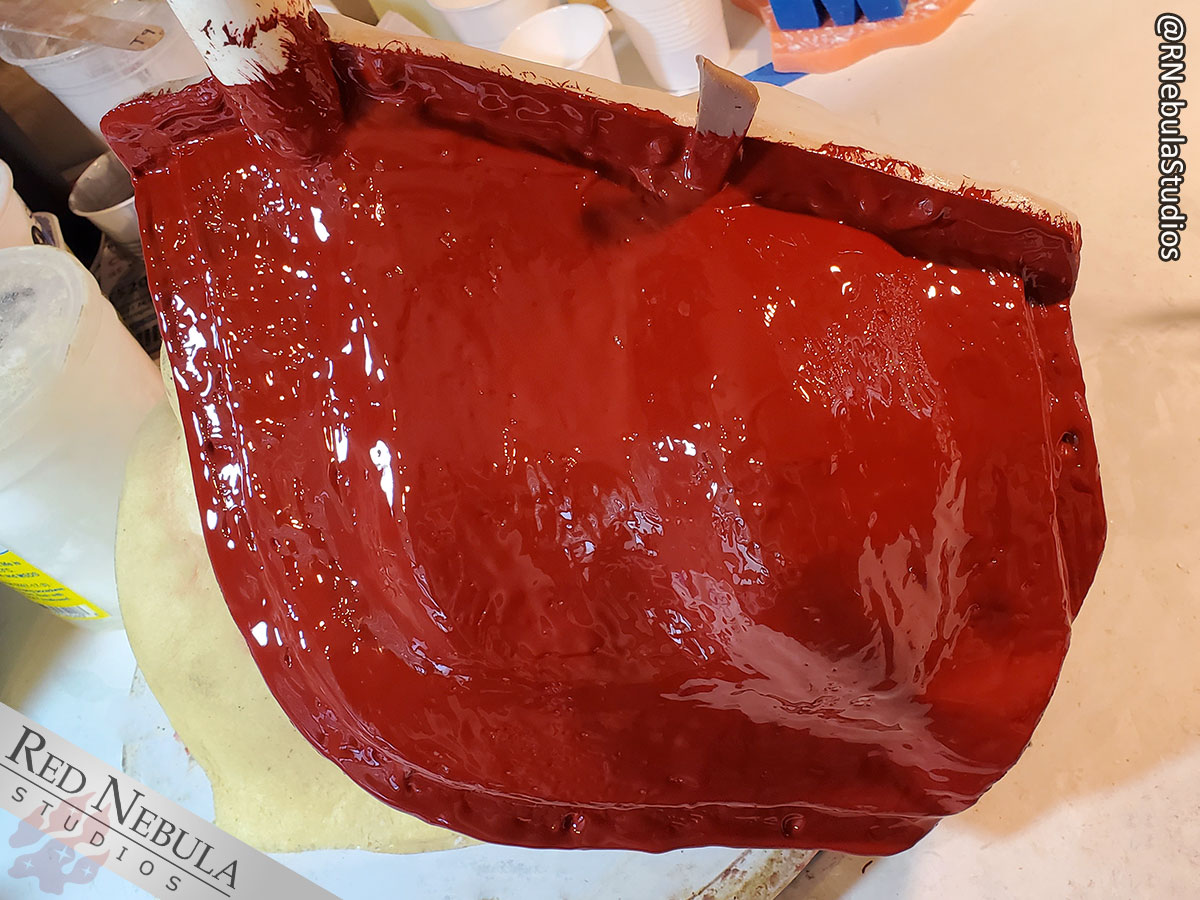
The Epoxacoat makes a great base layer, but it's pretty flimsy on its own, so I use a layer of FreeForm Air (you guessed it, another Smooth-on product!) to shore it up and complete the first part of the exterior mold shell. I've talked about FreeForm Air on the site quite a bit, but it's one of my favorite materials to use. It's an extremely lightweight epoxy putty that comes in two parts with a 1:1 mix ratio. There are other materials you can use to shore up your mold shell, such as Plasti-paste or even fiberglass, but FreeForm is my favorite technique and has worked great for my moldmaking over the years.
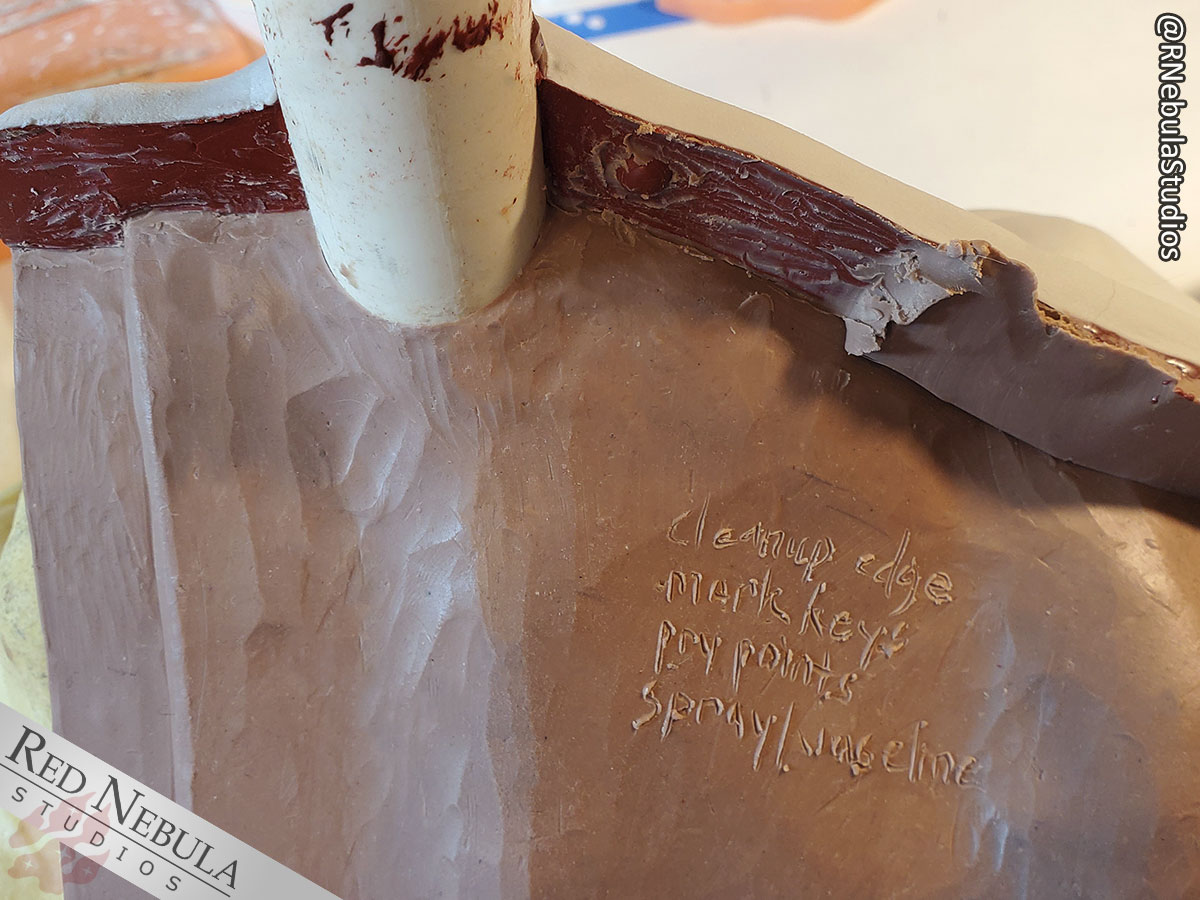
I let the first part of the mold shell cure overnight, then remove the clay mold wall to start on the second part. Oh, and if you're at all forgetful - like me! - the clay itself is a great place to keep notes and make sure you don't forget any steps. Just smooth it out when you don't need the notes anymore.
The clay will leave some residue on the first part of the mold wall. I use mineral spirits to soften and remove the excess clay and clean up the mold wall edge. I apply the mineral spirits with a brush (another chip brush, or a stiff paintbrush for smaller areas), leave it for a couple minutes, then use the brush to agitate it until it softens and melts off.
I also spend a little time sanding down the exposed edges of the mold wall before I start on the next part.
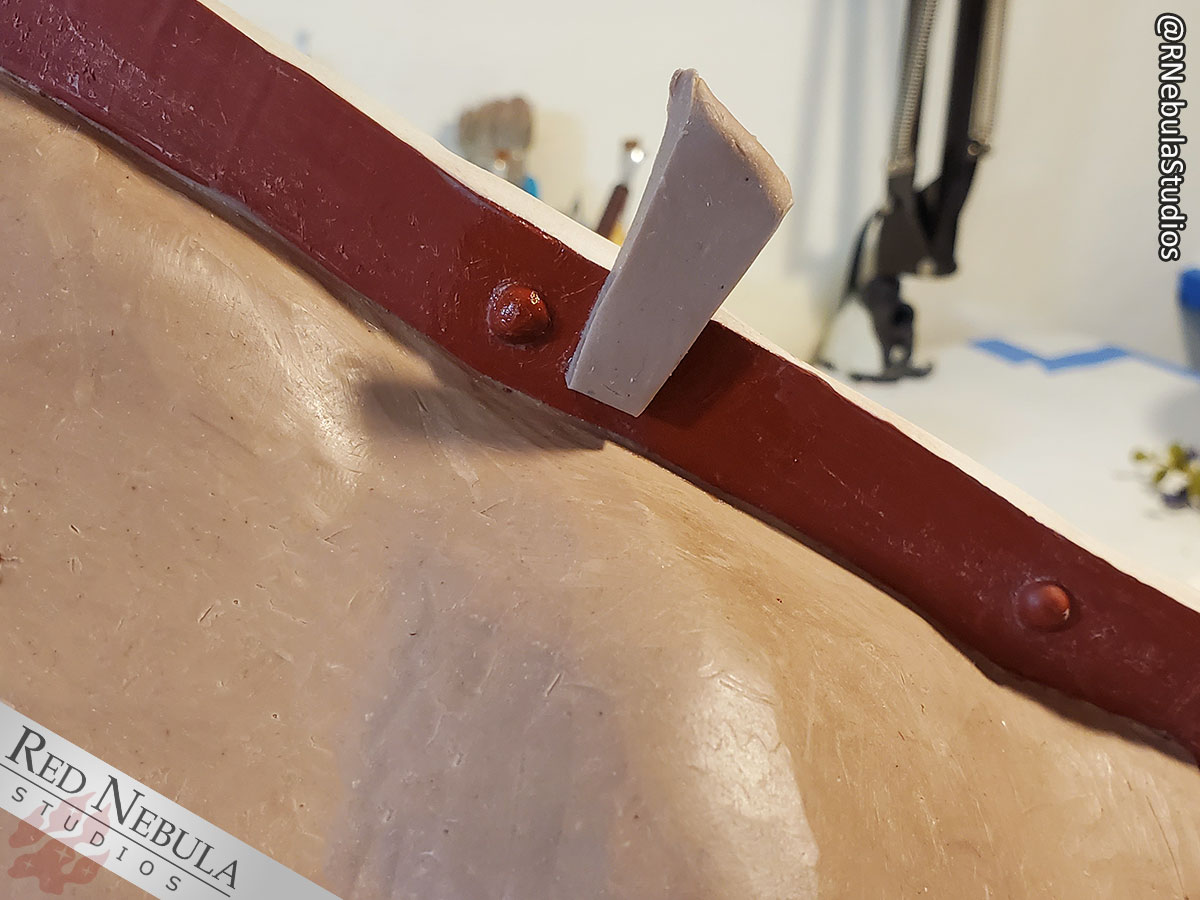
Next, I create a wedge-shaped piece of clay to use as a pry point. A pry point is an opening in the mold wall that you can use to pry the mold shell pieces apart. I just use a simple flathead screwdriver as a makeshift pry bar. You'll only really need to pry the mold apart when you're first creating the shell (it'll stick to the clay), and when you first pour in the silicone (which kind of suctions itself to the mold wall). After the mold is complete, the pieces will come apart easily with no prying required.
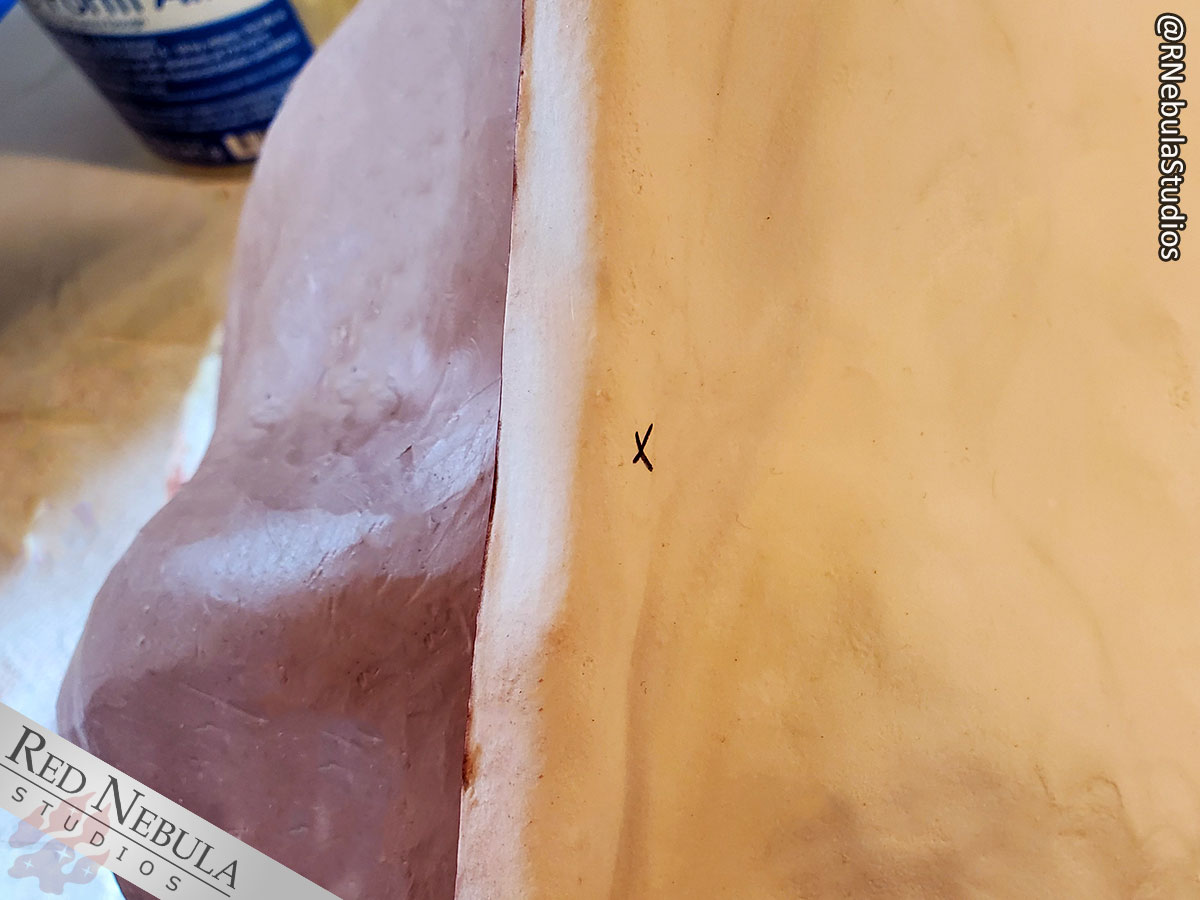
I also like to place a mark to indicate where the mold keys are. This way, as I'm working my way around the mold wall when prying it apart, I don't accidentally wedge my screwdriver into a key and chip it off. (And yes, I've done exactly that before - hence this addition to my process!)
 |
|
Finally, I apply a coat of petroleum jelly as a mold release wherever the second part of the mold shell will contact the first half, and to the PVC pipe forming my silicone pour spout. (Note I've removed my pry point wedge here, but I will add it back on and also apply petroleum jelly around it before the next step.)
Then, I simply repeat the same process again: Two layers of Epoxacoat, followed by the outer layer of FreeForm Air.
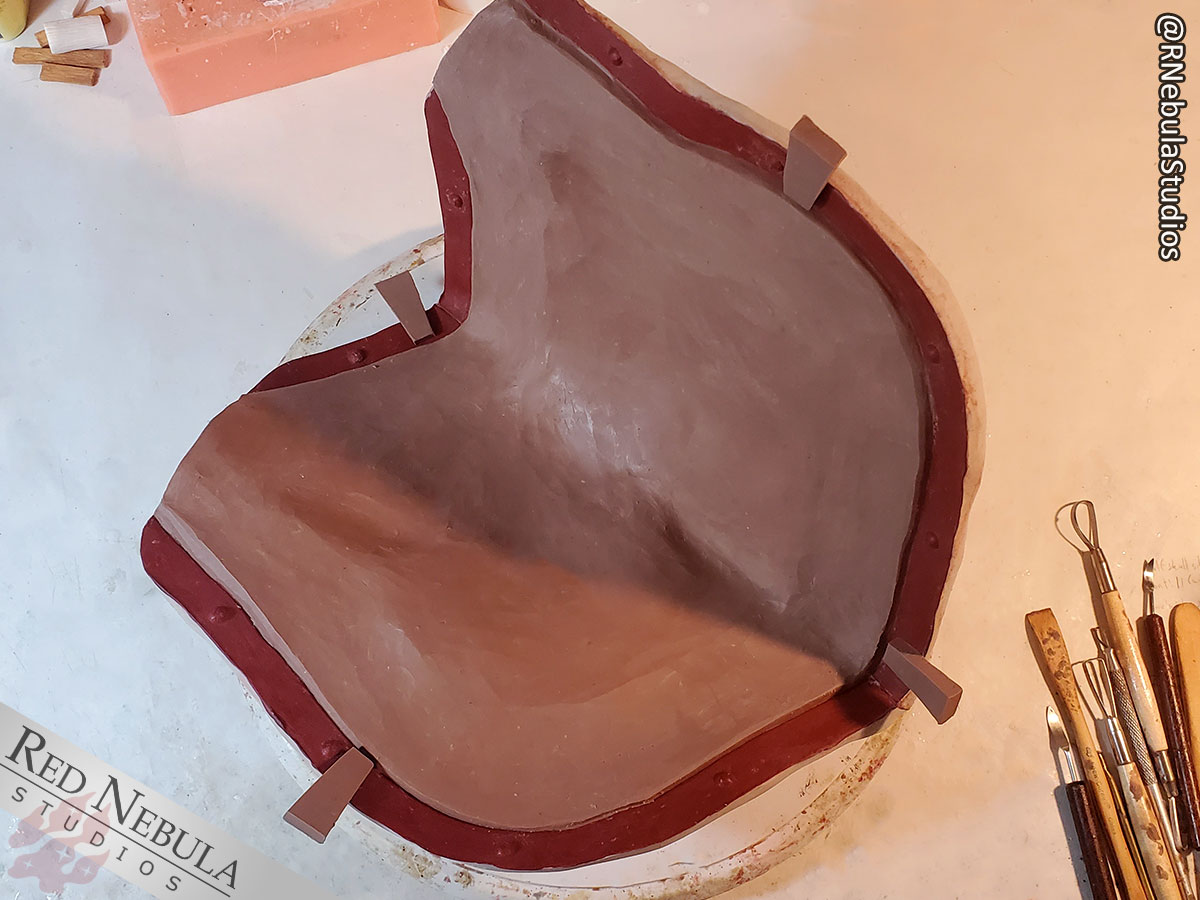
The two halves of the front mold shell will stay together quite nicely until I'm ready to pry them apart, so at this point, I flip the whole thing over, clean up any excess clay from the mold walls, sand down the edges, mark my keys, add pry points, apply mold release, and do the whole thing one more time. The process is still the same, two coats of Epoxacoat and one of FreeForm Air.
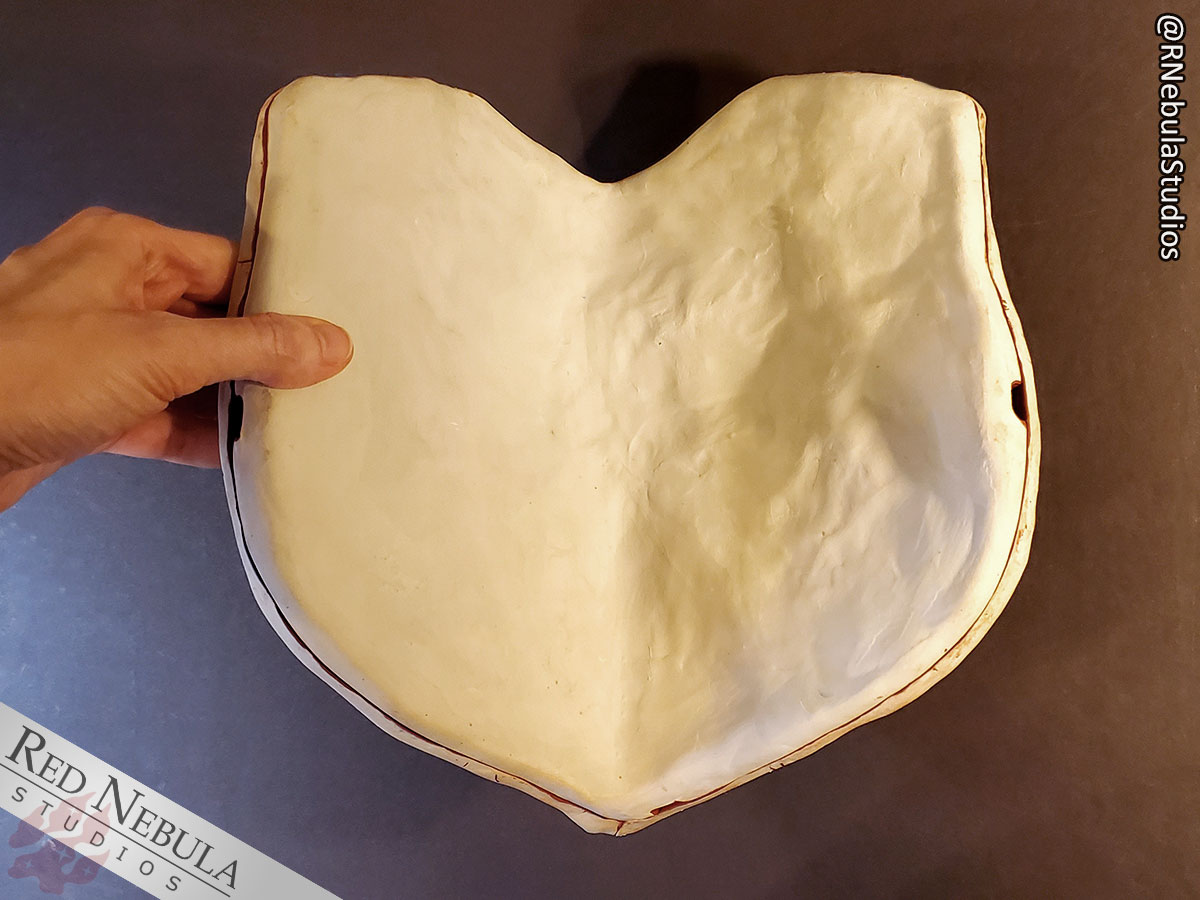
In the end, I've got a completed mold shell. Here, I've cleaned the clay out from the pry points, ready to pry the whole thing apart. And...

There we go!
Prying the mold shell apart does take a bit of time, so I've learned to be patient with it. I use the pry points to open it up a little first, then work my way around the mold perimeter with my flathead screwdriver to gently open it up a bit at a time, avoiding the keys as I mentioned before. Eventually, it starts to give more and more until it comes free.
Here, I've removed the mask from its cellophane wrap, because for the next part, I'll be adding the silicone that will need to conform to the mask's details directly. I will clean the clay out of the two front parts of the shell, but leave the clay in the back part, because I know the mask is now positioned exactly where it needs to be within the mold shell.
But more on that in the next blog!
All blogs in this series are linked from the Making a Matrix Mold page.
If you found this helpful, consider leaving us a tip or becoming a Patron! Your generosity helps our small business thrive.
Categories: Costuming
Tags: converting, Epoxacoat, epoxy, epoxy putty, Free Form AIR, key, matrix mold, mold shell, monster clay, mother mold, oil-based clay, owl, owl mask, pry point, resin, resin mask
Live Date: 6/13/2022 |
Last Modified: 9/29/2022