Matrix Mold: Owl Mask, Part 1: Introduction and Planning
Sarrah Wilkinson - 6/9/2022
One of my biggest projects over the last few years (and probably for at least a couple more years to come!) is converting all of my mask molds over to matrix molds.
What is a matrix mold?
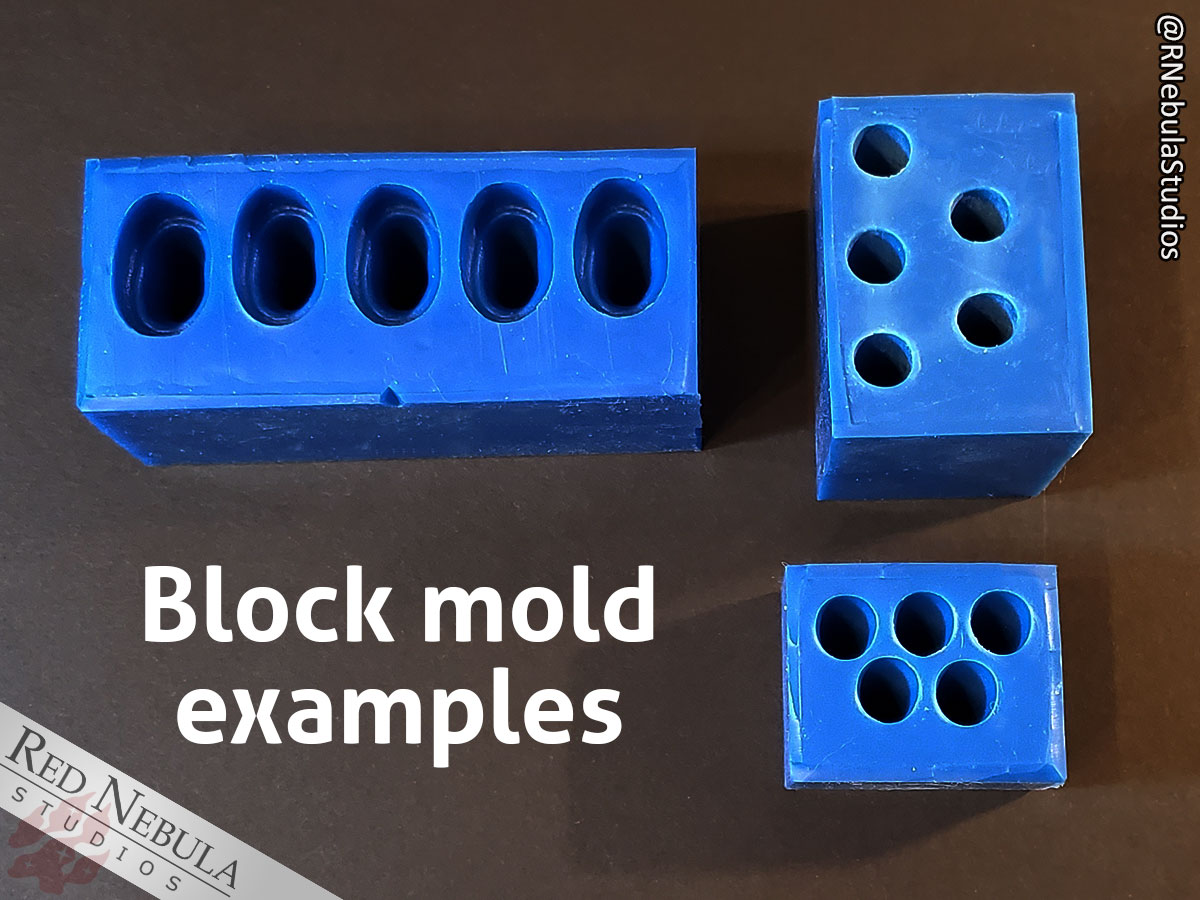
The more traditional style of moldmaking is a block mold. You create a mold wall around your piece, and fill the cavity with silicone, creating a "brick" of cured silicone with a hole (or holes) in the shape of the piece you intend to cast. Advantage? Very, very simple. Disadvantage? It takes a lot of silicone, and that stuff can be expensive. Especially lately! I make my smaller molds, like claws and teeth, as block molds, but for a mask, it just doesn't work. The block would be enormous and there would be a ton of wasted material!
|
|

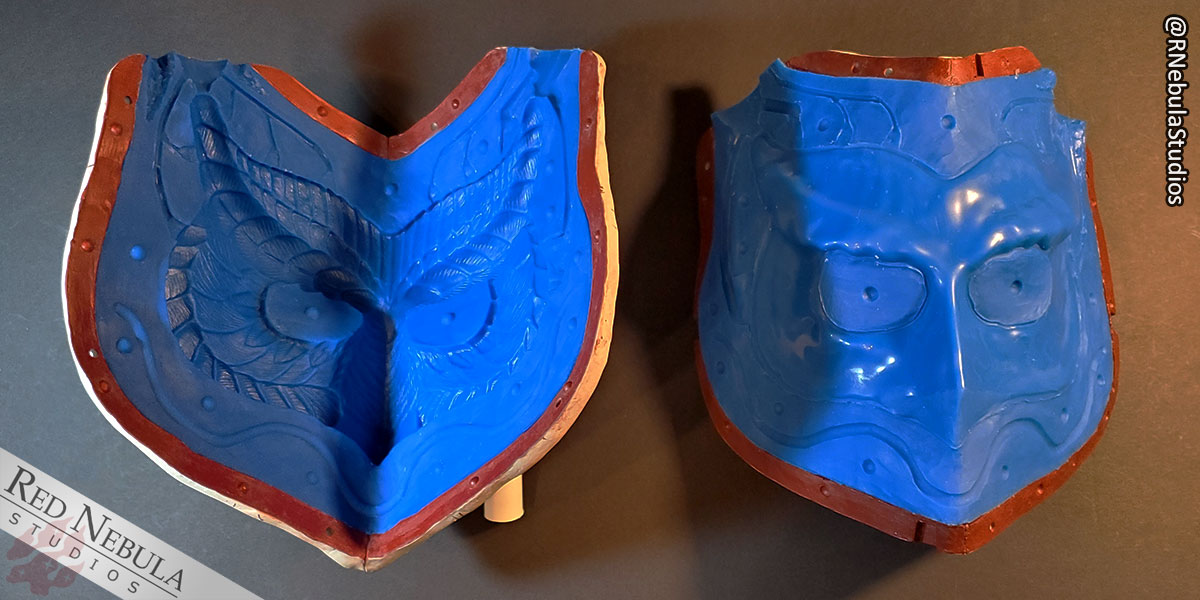
So for masks, I typically did what's called a glove or brush-up mold, where you use a thick type of silicone that can be brushed onto the surface of the piece. You do this in several layers, adding a thickening agent to subsequent layers until you have a nice, sturdy mold that conforms to the shape of the mask. You then create a mother mold, which is a rigid shell on the outside of the mold that helps it hold its shape. Advantage? Far less silicone used, and you don't need a pressure pot when casting. Disadvantage? It's easy to introduce bubbles to the mold if you're not super careful, layering up the silicone takes a long time, and making casts of the final mask can take between half an hour to an hour each time. Yikes! Yet that's how I've done it for years, and how I'm still doing it with my 'original style' molds.
Enter the matrix mold. It's the best of both worlds, with the added benefit of being very simple to cast. But - you knew there was going to be a but, right? - there are some caveats. You will probably need to invest in a vacuum chamber for your silicone and a pressure pot for your resin-casting if you go the matrix mold route. Also, while it may require less silicone than a block mold, it's still quite a bit more than a brush-up. Moldmaking may not be a cheap endeavor, but it's a rewarding one!
When creating a matrix mold, you start by first making the mother mold, the outer shell. Then, you position the piece inside and clay up one half, pouring the other half with silicone. Remove the clay, apply liberal amounts of mold release, and pour the other half with silicone, and voila! You've essentially poured a two-piece block mold with far less material being used up.
Of course, as with anything else in the molding and casting world, there are a lot of things to consider if you want to make sure your matrix mold comes out right. I'll try to cover everything I can think of in this series!
The Original Piece
One downside to matrix molds is there's pretty much no way to go from a clay sculpture straight to a matrix mold. Next time I create a brand new mask, I'll still go through the whole process of creating a glove mold and casting it first, and then convert it to a matrix mold afterward. You need a solid, rigid piece to start out with.
Of course, in this day and age, you might have access to a 3D printer where you could create a digital sculpture, print it out, clean it up, and go straight to the matrix mold process! Just be careful, some 3D printing materials do not play nice with silicone. Make sure to test for cure inhibition if you go this route!
Planning
Before I start making the mold, it's very important to take a good look at the piece and plan out my moldmaking strategy. I chose the owl mask to show as an example because, for the most part, it's a pretty simple, straightforward mask to convert into a matrix mold. It has a distinct front and back side, and very few tricky parts - though there is one thing I'll mention below.
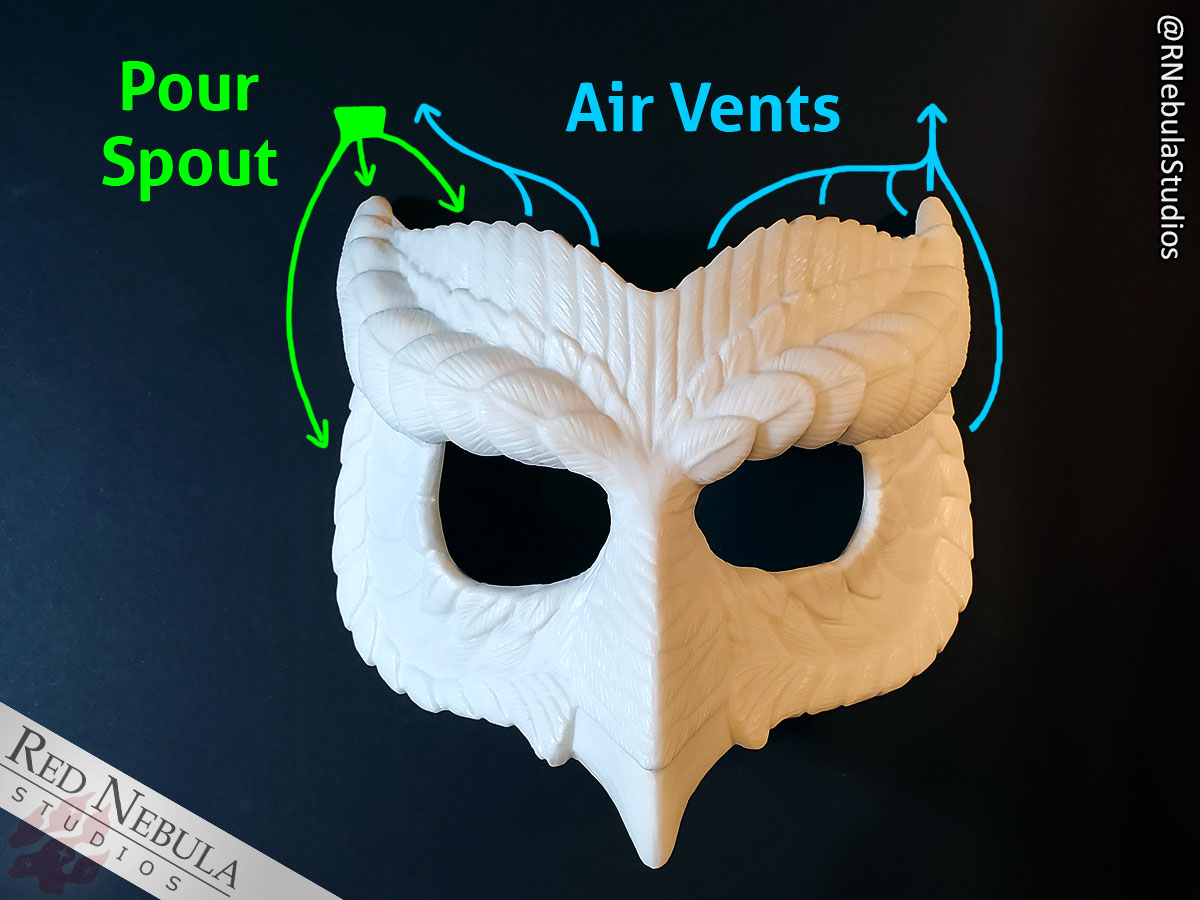
The owl consists of two 'horns' at the top. One horn can be used as a pour spout, the other as a location to vent out air. Your pour spout is where material is poured into the mold, and the air vents are there to allow the existing air in the mold to escape as it's replaced with resin.
One important principle I was taught (thank you, Nikki from Reynolds! <3 ) is this concept: Think like liquid. Keep in mind that liquid wants to flow downhill whenever possible, and cannot displace air if that air has nowhere to escape. Thinner liquids (like water) flow the easiest, but most materials we'll be working with (primarily silicone and resin) are thicker and more viscous. All of these things need to be taken into account, both when creating the mold itself and figuring out how it will be cast.
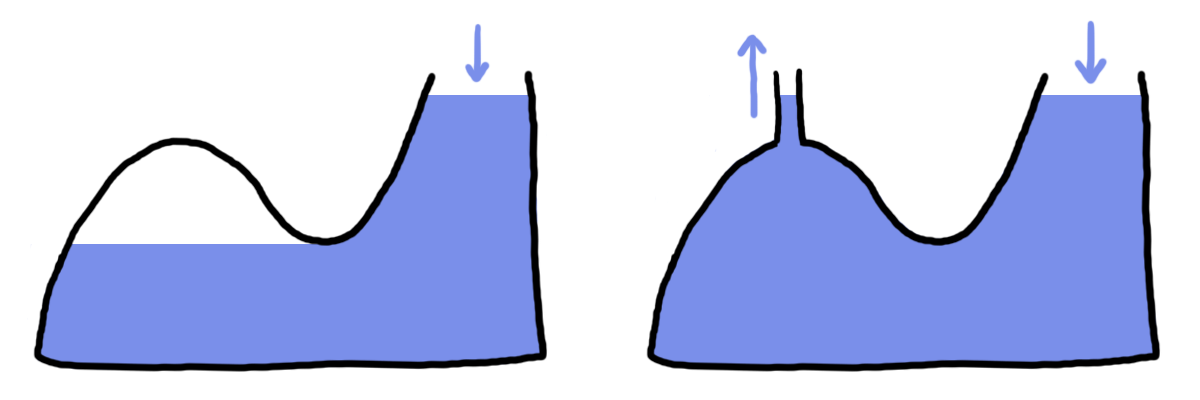
This is probably the most important concept, though. When you pour liquid into a space, the liquid will fill as much of that space as it can. However, if air gets trapped and it doesn't have anywhere to go, the liquid will never fill that space. This is where your air vents come into play. Hopefully my quick little illustration demonstrates just how important they are!
Remember when I said the owl mask does have one tricky part? It's related to exactly this problem.
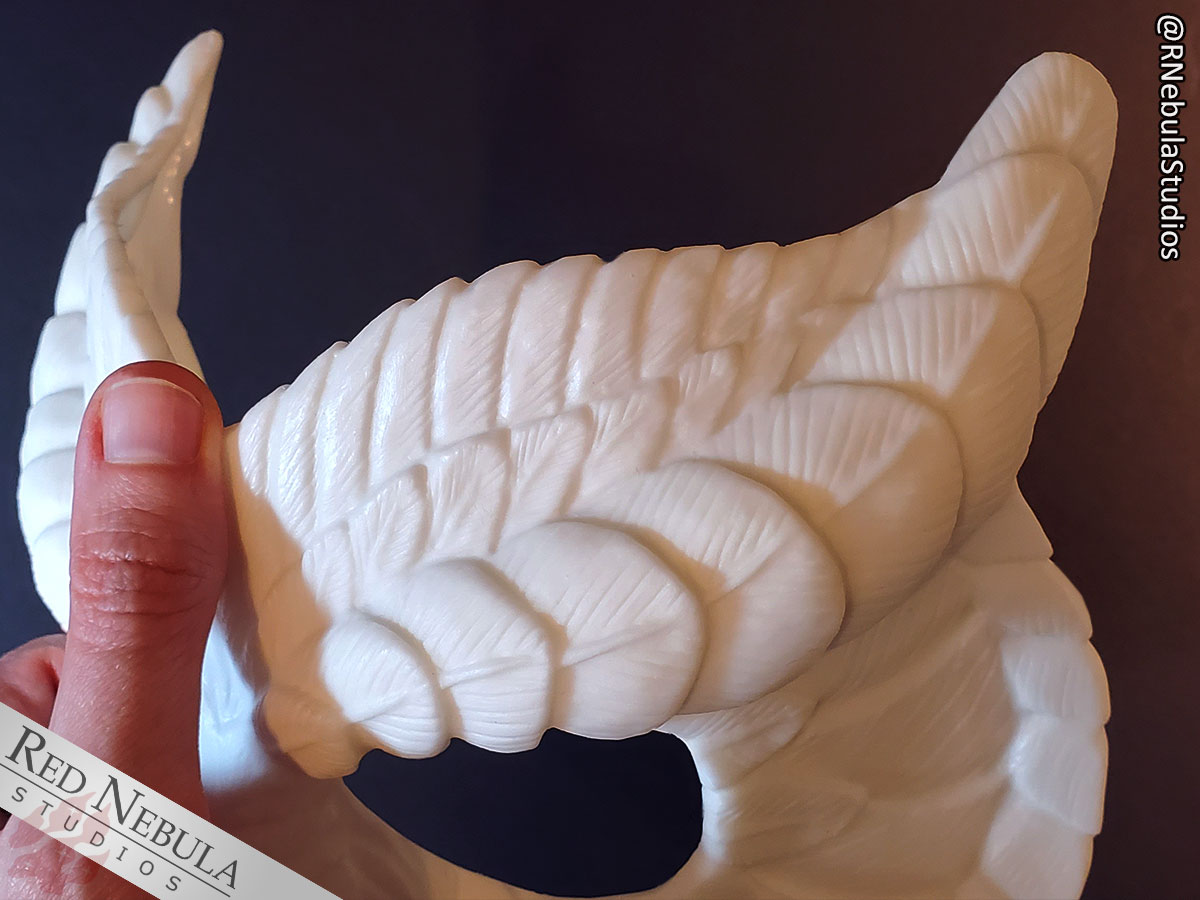
See that sort of 'saw-tooth' pattern the ridge of feathers along the forehead makes? Those are air bubbles just waiting to happen! There are two possible strategies for dealing with this. For one, I could create a small air vent at the top of each feather. That would mean a bit more cleanup on the final piece, but it'd work.
Fortunately, in this case, tilting the mask far forward so the beak points straight down means those feathers end up horizontal, and no longer create the potential for voids. It's things like this you'll learn to look out for when you create this type of mold!

So, as long as the final mold is positioned vertically like this when I pour it, the feathers at the top will not be a problem. All details of the mold point down or sideways, so the liquid resin will naturally flow to fill the whole space.
Now that I have a solid plan, it's time to make the mother mold shell. That will be covered in the next blog!
All blogs in this series are linked from the Making a Matrix Mold page.
If you found this helpful, consider leaving us a tip or becoming a Patron! Your generosity helps our small business thrive.
Categories: Costuming
Tags: converting, introduction, matrix mold, moldmaking, owl, owl mask, planning, resin, resin mask
Live Date: 6/9/2022 |
Last Modified: 9/29/2022